Below are the lists of ALL the recordings posted on Patreon. Please use your web browser (Cmd/Ctrl + F) to SEARCH the page for the topic you are looking for and click the corresponding link to take you into
PATREON to watch NOW.
The SHOP TALK, BEFORE to AFTER, and MORE items listed below can NOT be purchased here.
They are only available for PATREONS.
NOTEWORTHY SESSIONS:
LEARN THE BASICS OF THE TK8 LUMINOSITY PANELS IN PATREON’S SHOP TALK SESSION #38, #39 AND #41
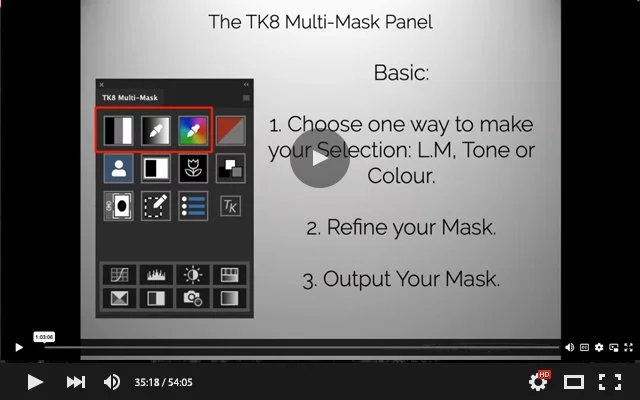
38 SHOP TALK-Luminosity Masks TK8 Panels Session 1
WATCH NOW ON PATREON

39 SHOP TALK-Luminosity Masks TK8 Panels Session 2
WATCH NOW ON PATREON
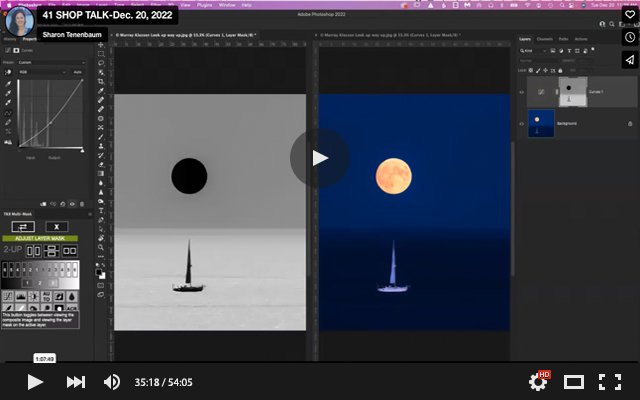
41 SHOP TALK - Luminosity Masks TK8 panel Session 3
WATCH NOW ON PATREON
Talk-&-Learn Session
Weekly image critique, Photoshop tips and artistic advice.
The photographic theme of Floral Abstract invites you to explore flowers beyond their literal form, using softness, color, and creative composition to evoke emotion and mood. This theme celebrates the delicate textures, flowing lines, and vibrant hues found in petals, stems, and natural patterns—but reimagined through abstraction. Think close-ups, motion blur, unusual angles, or layered perspectives that highlight the essence rather than the identity of the flower. To qualify, submitted images must clearly relate to florals while embracing an abstract approach in style and execution.
What is Architecture, and what is abstract? How do we marry the two?
The photographic theme of Architectural Abstract transforms buildings and structures into compositions of shape, line, texture, and light. By isolating details, emphasizing geometry, or playing with perspective, photographers strip away the functional context of architecture to transform it into the visual expression of the artist. This approach is rooted in removing context—eliminating the recognizable identity or purpose of a structure so that form takes precedence over function.
A visual exploration of rhythm, contrast, balance, and aesthetics remains, encouraging viewers to engage with architecture as pure design rather than as a place or space.
The photographic theme of Geometry focuses on capturing shapes, lines, patterns, and symmetry found in both natural and man-made environments.
It draws attention to the structure and form within a scene—whether it’s the sharp angles of modern architecture, the repetitive patterns in tiled floors, or the organic curves of a leaf.
Through thoughtful composition and framing, geometry in photography transforms ordinary subjects into striking visual statements that highlight balance, contrast, and rhythm.
Shadows in photography are more than just the absence of light—they are powerful storytelling tools that add depth, mystery, and contrast.
Shadows can sculpt a subject, define form, and create tension or intimacy depending on their placement and intensity.
Shadows invite the viewer to look beyond what's visible, offering a sense of mood, time, and atmosphere. Whether cast sharply in midday sun or softened in low light, shadows can transform an ordinary scene into something evocative and emotionally resonant.
"Nature in the City" invites you to explore the quiet coexistence—and sometimes contrast—between the natural world and urban environments. From weeds growing through cracks in the pavement to trees framed by concrete buildings, this theme challenges you to find and highlight moments where nature reclaims space or softens the hard edges of city life. It’s a chance to capture beauty in the unexpected and tell visual stories about resilience, harmony, and contrast.
Please note that for this session, we will address ‘Nature’ as vegetation and NOT animals.
The photographic theme "Use a Tripod" challenges you to create an image that clearly couldn’t have been captured without one. Think long exposures that blur motion, ultra-sharp details in low light, or perfectly aligned composites—images where the tripod is essential. But beyond the technique, the final image must also hold artistic merit. Composition, mood, and intention should come together to create a photograph that’s not only technically reliant on a tripod, but also visually compelling and meaningful.
The photographic theme "Choose a Color" invites you to build a compelling image around a single dominant hue, which should make up 80–90% of the composition.
This exercise challenges you to see the world through a more focused, creative lens—spotting color in unexpected places and avoiding cliché subjects like blue skies and oceans. Instead, explore texture, pattern, and form through your chosen color to create bold, striking visuals that speak with a unified voice.
High-key photography is a style characterized by bright, evenly lit images with minimal shadows and a predominance of white or light tones. Often used to convey a sense of purity, simplicity, or optimism, this technique reduces contrast to create a soft, airy atmosphere.
High key works especially well when wanting to display subtle detail that would normally get lost in a wide tonal range image.
In this session, we steered a bit away from our traditional format, and Sharon shared some of her bridge images, her vision before she took the shot, and some of the post-processing magic. In this session, you will get a glimpse into something we normally do in our pattern Before to After session, so don't miss out!
Bridges are a captivating subject in photography, offering both visual impact and symbolic depth. Architecturally, they present strong lines, repeating patterns, and dynamic angles that lend themselves beautifully to creative compositions—especially in long exposure and black-and-white photography.
Whether suspended over rivers, nestled in urban environments, or stretching across vast natural landscapes, bridges naturally draw the eye and can become powerful focal points. Beyond their structural beauty, bridges also symbolize connection, transition, and journey—making them rich in narrative potential.
Photographers can explore a range of styles when capturing bridges, from wide-angle cityscapes that emphasize scale and setting, to close-up details that highlight texture, form, and craftsmanship.
Close-up photography invites viewers into the intricate details of the world around us, revealing textures, patterns, and forms that often go unnoticed. By focusing tightly on a subject—whether it’s a flower petal, an insect, or an abstract surface—photographers can transform the ordinary into something extraordinary.
Exploring different subjects and techniques with originality and creativity is key to making your work stand out. By pushing boundaries and experimenting with perspective, lighting, and composition, you can develop a unique visual voice that brings fresh l
Seascape photography captures the ever-changing beauty and drama of the ocean, offering endless opportunities for creative expression. From long exposures that smooth out waves into misty dreamscapes, to fast shutter speeds that freeze the raw power of crashing surf, seascape photography invites a wide range of techniques. Shooting at golden hour or blue hour enhances mood and color, while using filters like ND or polarizers can dramatically transform the scene. Whether focusing on sweeping vistas, abstract reflections, or the subtle textures of water meeting land, seascape photography is a powerful way to connect with nature and tell its story through your lens.
Landscape photography is a timeless genre that captures the beauty and grandeur of the natural world, but in a field with such a rich history, standing out is key. Drawing inspiration from centuries of artistic expression, the most compelling landscape images often come from those who dare to see differently—who break the rules, challenge conventions, and bring a fresh perspective to familiar scenes. Just as the great artists of the past redefined their mediums, modern landscape photographers can push boundaries to create work that is not only beautiful but truly original.
Food photography is more than just capturing a meal—it’s about storytelling, culture, and emotion. From vibrant street food to elegant fine dining, every dish tells a story through color, texture, and composition.
Lighting plays a crucial role, highlighting the richness of ingredients and the artistry of presentation. Whether it’s the steam rising from a fresh-baked pie or the glisten of syrup on pancakes, food photography evokes taste and nostalgia, making viewers crave the experience beyond the image.
Action Photography captures movement, energy, and dynamism, freezing moments that the eye might otherwise miss. Whether it’s a speeding athlete, a bird in flight, or waves crashing against the shore, this theme requires quick reflexes, fast shutter speeds, and precise timing. The goal is to convey motion and intensity, drawing the viewer into the scene and making them feel as if they are experiencing the action firsthand.
Alternatively to freezing a moment with a fast shutter, using a slow shutter speed can create a sense of motion blur, emphasizing the fluidity and direction of movement, adding a more artistic and immersive feel to the image. It is up to you the artist, to find the best shutter speed to depict the Action Story you wish to tell!
The Low Key photographic theme is defined by deep shadows, minimal lighting, and high contrast to create a dramatic, moody atmosphere. By emphasizing darkness and selectively illuminating key areas, this style enhances mystery, emotion, and depth. Often used in portraiture, still life, and fine art photography, low-key lighting draws the viewer’s attention to the subject while evoking a sense of intrigue, tension, or intimacy.
The minimal illumination that is present, should subtly hint at the conversation of the story within the image, inviting the viewer to look deeper and interpret its meaning.
The Shine a Light photographic theme focuses on the transformative power of light in storytelling and composition. Whether it’s dramatic directional lighting, soft ambient glow, or striking contrasts of shadow and illumination, light becomes the main subject, guiding the viewer’s eye and evoking emotion. This theme highlights how light reveals texture, shapes mood, and creates depth, turning ordinary scenes into captivating visual narratives.
Due to a poor internet connection, the recording starts a few minutes into our presentation, so don’t be alarmed by the lack of the usual intros. The essence of the Talk-&-Learn is still here.
The Rule of Odds in photography is a compositional principle that suggests an image is more visually engaging when it features an odd number of subjects, typically three, five, or seven. This technique creates a natural sense of balance and harmony while maintaining a dynamic, asymmetrical appeal.
Odd-numbered groupings prevent the eye from settling too quickly, encouraging deeper exploration of the frame. Whether applied to portraits, still life, or landscapes, the Rule of Odds enhances visual interest and adds a subtle layer of storytelling to the composition.
The photographic theme of Simplicity focuses on minimalism, clarity, and the power of a single subject.
By eliminating distractions, photographers create images that feel clean, balanced, and impactful. Negative space, soft lighting, and a limited color palette often enhance the sense of simplicity, drawing the viewer’s eye to the essence of the composition.
This approach allows for a deeper emotional connection, as the subject stands out without competing elements, conveying a sense of calm, elegance, or even profound meaning in its purest form.
The theme of Framed uses natural or artificial elements to create a visual border around the subject, drawing the viewer’s eye and adding depth to the composition.
Frames can be anything—from doorways and windows to tree branches or shadows—helping to isolate the subject and enhance storytelling. This technique not only guides focus but also adds context, creating a sense of place and emotion within the image.
When used creatively, framing transforms an ordinary shot into a compelling, well-structured photograph.
Golden Hour is the period shortly after sunrise and before sunset when the sun casts a warm, soft light that enhances textures, colors, and depth in photography. While this golden glow creates a visually appealing atmosphere, capturing an original image requires more than just a yellowish tint.
Composition, subject, and storytelling play key roles in making the most of this light. Instead of relying solely on the warm tones, photographers should focus on contrast, shadows, and the emotion conveyed in the scene to create compelling and unique images that go beyond just a “golden” aesthetic.
Nighttime photography captures the beauty and mystery of the world after dark, transforming ordinary scenes into something magical. With the interplay of lights, deep shadows, and slow shutter, photographers can create stunning images of cityscapes, starry skies, or illuminated landscapes.
This genre often involves techniques like light painting, astrophotography, and high ISO shooting to reveal details hidden in the darkness. Whether capturing neon-lit streets or the vast expanse of the Milky Way, nighttime photography offers endless creative possibilities.
Patterns in photography offer a captivating way to explore repetition, structure, and symmetry in both natural and human-made environments.
From the intricate geometry of architectural details to the rhythmic arrangement of leaves in a forest, patterns can reveal hidden beauty and order in the world around us.
These recurring shapes, lines, and textures create visual interest and often evoke a sense of balance and harmony.
By focusing on patterns, photographers can transform everyday scenes into striking compositions that invite viewers to pause and appreciate the intricate designs that surround them, whether they are obvious or subtly woven into the fabric of our environment.
Over the past few months, participants of this course have dedicated themselves to meticulously curating, post-processing, and refining their images to align with their creative vision, resulting in a body of work worthy of gallery display. During the presentation, they will share their Vision Statements and proudly showcase their final images.
Curves are a universal element in photography, offering a sense of fluidity, movement, and harmony.
Whether it’s the graceful lines of a winding road, the sweeping arcs of modern architecture, or the natural contours of the human body, curves guide the viewer’s eye and evoke a sense of elegance and softness.
Curves appear in both natural and man-made environments, from the undulating shapes of landscapes to the delicate bend of a leaf.
By emphasizing curves in a photograph, we can capture the organic flow that exists in every corner of life, highlighting a rhythm that feels both timeless and dynamic.
The theme of animals in photography captures the raw beauty, mystery, and diversity of the natural world. Whether it's the wild majesty of a lion or the intimate gaze of a bird, these images evoke emotion and a deeper connection with the creatures around us. However, in today's age of oversaturation, it’s important to move beyond the cliché—like the overdone photos of a house cat curled up in a sunbeam. Instead, strive for originality, exploring animals in their natural habitats or capturing lesser-seen moments that reveal their true essence. By doing so, we can tell more compelling and thoughtful stories that go beyond the expected.
The theme of music in photography captures the essence of harmony, rhythm, and movement, translating auditory experiences into visual storytelling.
Whether it’s the vibration of a guitar string, the sweeping motion of a conductor’s baton, or the energy of a live performance, music-themed photography evokes the emotion and dynamism of sound.
By focusing on textures, gestures, and the interplay of light and shadow, photographers can create images that resonate with the rhythm and soul of music, celebrating its universal and timeless appeal.
SHOP TALK
Bi-Weekly informal forum to ask Sharon any Photoshop questions you have.
Today we learned how to create composites in Photoshop.
How to add two pixel layers into one file.
How to reduce your file size by only adding the relevant parts of the pixel layer to your master file.
Creating blurs to add motion to a subject.
Masking your subject and checking your mask for blemishes.
We dabbled with the Layer Style and saw how to overcome the glitch of adding a mask (place layer in group and add a mask to the group).
If you don't have any images of your own, I have attached a few images for you to work with here.
I encourage you to create a composite for next week and upload your image for us to see.
Questions Addressed:
On Anita Images, we saw how to work with the Gradient Layer, the Gradient Tool, and how to combine each one with the use of Selections.
Richard had a question regarding the use of various brushes, for cloning or the brush itself, and reverting back to a round brush after using a shaped one.
We had lots of fun on Josh's Mandala Image. It was team work to get an Escher like image.
We had a look at the Path Blur, how it works, and what it can do. Sharon will still look into a few questions regarding the Path Blur, and we will address them next week.
Sharon shared her Little Island image to show how she cleaned all teh stains on the concrete. A lot of patience and the help of Generative AI!
We had an informative discussion on printing your images with feedback and tips from participants on which home printers they recommend. The top ones were:
Epson Surecolor P800, Canon Pro-100, Epson ET-8550 and Epsin ET 2800 Color Tank printer.
Amazing, Amazing, AMAZING work from participants!
Thank you all for taking this technique and running with it. Your creativity knows no boundaries. I was truly impressed.
I highly recommend watching this session to see and learn about the various possibilities this technique offers.
Today, we saw how to create a pattern of shadows in post-processing.
Also, two videos explain how to create an array in Photoshop here:
1. Array in Photoshop by Howard Pinsky: https://www.youtube.com/watch?v=lw69mxbMw9s&list=PLRcaeNtMQimNaoYP9_MCQN0rVPB4QV3F2&index=23
2. Learn HOW TO Use Arrays in Photoshop by Printed Village: https://www.youtube.com/watch?v=LCMav7YpazU&list=PLRcaeNtMQimNaoYP9_MCQN0rVPB4QV3F2&index=22
Exploring the new capabilities of the Interactive Gradient Tool. We saw how to use it on an Adjustment Layer Mask. The difference between the Gradient types (Foreground to Background and Foreground to Transparent). A great session if you understand the principles of a Gradient!
Questions Addressed:
We reviewed how to submit a question and file for a Shop Talk session.
We saw how to utilize the Color Transform Filter within the Neural Filters to create a series of images with uniform toning.
We looked at Carol's image and saw a) how we would enhance the water puddle and b) that we gave Carol some composition advice on her IR image of the birch trees.
We answered Cheryl's question on how to create pastel colored architectural abstract images. We showed how to do this in two different techniques.
Lastly, we addressed and talked about Carol's image of the solitary rock amongst the crashing waves. We had some interesting discussions about the correlation of the visual story to the intention.
Questions Addressed:
We stared out with Mark's image. Mark noticed that the reflection of the two towers was cropped. We say that the Ai did a great job in extending the canvas and we just had to put in a little bit of work in cleaning the reflection to shape it to match the top ends of the towers.
On Carol's image, we say how to fix the lines that resulted from the water line (cloning) and the motion blur (selecting and stretching).
On Cindy's images, we saw the power of the Luminosity Blend Mode. Ho to either match colours from one image to another or get rid of very subtle colour contamination.
Lastly, on Christin'e image we saw how to clone....
Questions Addressed:
We discovered that the new version of Nik does allow grouping control points. If you want to make a change to more than one Control Point at a time, best to select all the points and now every change you make will affect them all.
Why and when to convert your layer to a Smart Object (allows re-editing).
We took a deep dive into understanding Channels. What they are, how to use them when creating a Mask.
Various operations with Selections.
Plus as always, interesting group discussions :)
WATCH NOW ON PATREON
Questions:
Understanding how the Stepping Rings work with magnet rings. A little overview plus discussing the importance of always having a polarizer on your lens.
We had a look at Judy's image on the topic of Patterns. We saw how we could make it different.
Working the LAB color space and Smart Objects.
Questions Addressed:
We saw how to create a multiple exposure from a single image.
We fixed Carol's problem with rasterizing a Frame layer.
We talked a bit more about the Frame Layer and how it works. to understand more about the Frame Layer I recommend watching Julieanne Kost's video: https://www.youtube.com/watch?v=DQEMO4ECLqc
We saw how to create Mock-up images of your artwork in an interior setting.
We talked about converting Xu image of the flamingo to B&W.
Questions Addressed:
We tried to make an animal face smile in various ways. We saw that the Neural Filters didn't do a good job of recognizing a face, so we moved on to the Puppet Warp and the regular Warp Tool.
We saw why Richard was having difficulty getting his Selection menus enabled (hind: must have marching ants active).
We tried to tackle Carol's problem with rasterizing a Frame layer. I have never worked with the Frame tool/Adjustment Layer so I wasn't much help but will explain how it works next week. After looking further into it I found the solution: Right-click on the Frame icon in the Frame Adjustment Layer and convert to a Smart Object - > Then rasterize the layer.
Also, I will look into the Brush and Path Symmetry feature - will demonstrate how it works next week.
Questions Addressed:
1. We saw a better way to remove halos. No need to make any selections. Just add an empty layer, clone the halo but don’t forget to change the blending mode of the empty layer. (Darken or Lighten – depends on the type of halo). Thank you Sam for sending this over! see video here: https://www.youtube.com/watch?v=4v1kKh3mI2A
2. We saw Carol’s abstract image of the elephant and gave her feedback and what we thought looked better.
3. We had a close look at Judy’s architectural B&W image and say a few ways to enhance it.
4. We didn’t dive into Mark’s image. However, I am posting here the links to what Mark recommended we watch on how to make puddle reflections:
a. https://www.youtube.com/watch?v=fZCfJAenQ24
b. https://www.youtube.com/watch?v=VX_qHo1eGUo
Mark, I will have a closer look at these videos and will get back to you with my comments in a future session.
5. We talked about the concept of various series and tried to help Cindy conceptualize.
6. Lastly, we welcomed Steve to the group and did a recap on how to register to Talk-&-Learn when you want to submit an image and how to submit a question for Shop Talk.
Questions Addressed:
1. We saw Kim’s image of the two trees, her progress, and some suggestions we had to improve it. Adding to the composition and mood of the emotional story,
2. David’s image: we addressed composition and the relationship of the sky. Adding a light beam and overall story.
3. Carols images. We saw Carol’s progress with the Wildebeest and gave some feedback on improving as well as the new image of the goldfish – what to do when you can't get rid of a colour? We embraced it with a twist!
4. We also had time for Mark’s image to see how we could make the artificial puddle reflections look better. We didn’t quite achieve the objective but we did have some suggestions.
5. Finally, we say what to do when you are working on a composite image and you want to control what layer is moving or being adjusted rather than the computer!
6. Lastly Finally….Kahsia recommended watching this video about The Photograph as Haiku: https://www.youtube.com/watch?v=y1-3T_YsN-s
Questions Addressed:
1. We had a look a look at Mark’s image which he worked on – great job Mark! We gave him some feedback on fixing edges. Mark also sent us an article describing how to reduce t=your file size, you can find it here: https://design.tutsplus.com/articles/how-to-make-your-photoshop-file-size-smaller-best-tips-and-tricks--cms-34844
2. We had a look at Carol’s animal abstract image and collectively gave her feedback on how to improve it. Carol, we are looking forward to seeing your implementations next week!
3. Kim’s Image Stacking Tree. We saw how to make it look ‘less busy’. We selectively stacked, aligned and masked each tree separately. Then we worked on tones and saw why it is so important not to start with a B&W image in PS but work on a colour image.
4. We reviewed Cindy’s landscape ICMs. We analyzed which ones work and why and how to take a couple and keep working on them. Cindy, you too need to show us your progress.
5. We touched on removing halos and I demonstrated how to do that with cloning. Next week we will talk about removing halos with blending modes.
6. Lastly, we saw what to do when all you have is an iphone jpg to work with. How to increase it’s size in Photoshop and in Lightroom.
Questions Addresses:
Feedback on Kim's image. Does it work as a B&W, colour, multiple exposure, or single shot? We all chimed in and gave Kim some ideas.
We saw on Josh's image how to blend in content that is generated by PS AI.
Cheryl shared with us how she used the Stamp Brush Tool - wow! such a powerful tool. She also recommended we watch the Youtube videos by Nikki Harrison:
How to Make your OWN Digital Backgrounds: https://youtu.be/frL6utV65dg?si=WjHA4lkCXIZN4S1B
How to Paint a Digital Background in Photoshop: https://youtu.be/Aw--uHXb6Fg?si=VEk7xv-fXzzEOaTP
We had a group discussion about Diane's image. How, when and where to break boundaries of art.
Saving a jpg file vs. tiff or PSD file.
Questions Address:
We analyzed Marks's staircase image. We figured out how to remove the color cast as well tackle the composition. a few suggestions were made and I think that in the end we all did a pretty good job at improving the image!
On Carol's image: we saw how to improve the shadow of the lizard plus, how to blend the lizard better with some perimeter blur.
Cindy's image: improving overall brightness and color.
On Judy's composite image of people crossing the road, we reintroduced a little color and redid the perspective of the people in the shot with some gentle warping.
Questions Addresses:
We saw in Carol's image how to deal with the edges of an image that don't come out quite blurred.
In Cindy's images, we took the composition in a completely different direction....we are kept biting our nails to see how Cindy continues the post-processing and completes the vision of the image.
We saw how to tie in separate Paths.
Questions Addressed:
1. We worked on Judy's image:
How to selectively straighten buildings independent of adjacent buildings. Plus a few composition tips.
2. Cindy's Image:
Tying in various paths that have common sections into one.
Composition tips
Exaggerating the curve with the Warp
What to do with the sky....
3. Lucia's image:
Redesigning the composition, squishing one side and stretching the other for a non-symmetric composition.
Adding a gradient in the widow for a balanced composition.
Adding color to light beams.
Questions Addressed:
Setting your Hue and Saturation Adjustment Layer.
Worked on Josh's image, enhancing the iceberg. Luminosity Blending Mode, removing black stains etc.
We figured out how to change the color of a light beam (add a Solid Color Adjustment Layer, clip it to the Light Beam layer but DO NOT change the blending mode to Color.
A recap on how to make skyline reflections.
a few odds and ends with Generative Fill.
Questions Addressed:
Reviewing Richard's Before and After IR Images.
Reviewing Cindy's waterfall images with suggestions for post-processing. We also saw how to export a Luminosity Mask to a Pixel Layer.
We revisited Kathleen's IR image and saw what to do with the Selective Color Adjustment layer in Photoshop to bring out the Yellow/Blue colors.
How to RESET your mask. Black or White.
How it Inverse a Path!
Topics Addressed in this Session:
Image critique of Richard's IR images, one for composition and the other for colors. We added a Color Lookup Table to keep the vibrant hues of the IR 590 nm filter.
Horizontally straightening Cheryl's image, added a few tweaks to the color of the ground. And, we tried but not much success to darken the tone of the left pink wall.
In Susan's image, we moved the guy on the scooter to the fore and blended him in with the Auto-Blend feature - it did a great job!
Lastly, in Mallory's image, we saw how, when photographing an actual painting, it needs to be straightened and we saw how to change the color of the background (of the wall it's on).
Topics Addressed:
IR Image. In my latest update, my LR Custom IR Color Profile got deleted. I tried creating a new one, but as you will see, I made the mistake of not saving the exported file into the default directory, instead, I placed it in a different folder which resulted in LR not finding it. - This will be continued next week in Sharon's pre-recorded session - stay tuned....
We saw in Susan's image of the Chrysler Building what to do to give it more presence. Delete the building behind it, select the Chrysler Building, place it on its own layer, and stretch it a bit (enlarge it).
How Focal Blur works (in the Neural Filters) and using them with the TK Luminosity Mask Panel for further masking.
Sharon shared some drone footage..
lastly, I gave Richard some feedback on his seagull image.
Questions Address:
1. We had a look at Ruby's image and saw how we could improve it. Working with lights, shadows and B&W.
2. Working with the Gradient Tool. It tends to be finicky when started outside the frame, we saw the workaround.
3. Sharon tried to quiz you with a few questions to keep you on your toes!
4. We had a look at Josh's skyline image. We created a reflection and added a blur.
5. Sharon post-processed one of her night-time(ish) images. Combining bokeh lighting with a regular still shot. We also saw how to create (even though it's not quite the same) bokeh lighting with the Maximum filter. Please see 05 Before to After on Bokeh Lighting for all the tips and tricks!
6. lastly, thank you Mark for sending us the page on Rob Shea's website in which you can create an IR profile as the DNG Profile doesn't seem to work with the latest computer updates. Here is the link: https://www.robsheaphotography.com/infrared-profile-pack/
Questions Addressed:
1. To Upgrade or not to Upgrade....this video might help shed some light on the advantages of the new Nik Collection upgrades (thank you Mark Stevens): https://www.youtube.com/watch?v=rIIXo_Aoa7c
2. How to upload your questions and images for Shop Talk.
3. Resizing - Pay attention to the proportion lock, is it On or Off?
4. Using a laptop vs. Desktop as a main computer.
5. The Maryland Photographic Alliance is having a webinar on the Nik collection with a focus on Viveza and silver effects on Sept. 16th at 7PM eastern time - anyone is welcome to register.
6. A heated discussion on what camera bag to buy....does the perfect bag exist???
7. What to have in your camera bag? to take an extra body or not?
Questions Addressed:
1. Reducing halos or other artifacts from the outline of a subject.
2. Image reviews of John's IR images.
3. Sharon shared three of her new/old images of the Alberni by Kengo Kuma building - sharing her vision of how to proceed with them.
Following up on last week's Blending Modes, here are two helpful videos on Group Blending Modes
1. Apply a Blend Mode to a Layer Group with Julieanne Kost
https://youtu.be/tbON_ZH66Tc?si=tiJ-yTZCeAtoEfuW
2. Why Layer Effects and Clipped Layers work differently when Applying Blending Modes by Digital Mastery
https://youtu.be/dEm_rMpVllY?si=cIXNXy5JOKKHX3IK
Understanding Blending Modes - An overview of what are Blending Modes, different types, and their grouping.
We also saw the difference between the Normal and Pass Through Blend Mode of a Group. Next week we will address blending modes of brushes and inside a group.
Additional Questions Addressed:
1. How to develop your own voice as a photographer.
Questions Addressed:
1. Understanding the Gradient Tool, the Classic and New Interactive Gradient.
2. Ways to create a High Key Image
3. Updating your Color LookUp Tables. Please look in Shop Talk 78 for what to do if you don't see all the filters you need under the Abstract Tab of the Color LookUp Table.
4. Josh is going to Alaska so we all chimed in on best practices for photographing snow.
My apologies but Patreon's email service wasn't working. I emailed the session link three times but it wasn't received. I ended up emailing it individually to people who emailed me and requested it.
Questions Addressed:
1. Extending a canvas to add Sky using the Crop Tool.
2. Various ways to create a Stroke.
3. The Color Lookup Abstract Folder. If you don't see more filters this is what you need to do:
On a Mac:
Copy Files from:
Macintosh HD/Library/Application Support/Adobe/ "Color Profiles"
To:
Macintosh HD/Library/ColorSync/Profiles
On Windows:
Copy all the ICC files from C:\Program Files (x86)\Common Files\Adobe\Color Profiles , then paste them into:
C:\Windows\System32\spool\drivers\color.
Reboot PS.
Questions Addressed:
1. Best way(s) to eliminate dust spots in post and Sharon's encouragement to clean your own sensor - a full tutorial on how to do that will be coming up soon.
2. opening files in LR, editing in LR and saving in Photoshop...how to sync your libraries.
3. Resizing files in PS, making an Action to resize
4. Resetting a tool.
5. Straightening architectural lines with the Adaptive Wide Angle Filter.
Questions Addressed:
1. The banding effect with the Gradient Adjust Layer, not quite resolved but we found a work-around by using a Curve Adjustment Layer and the Gradient Tool.
2. Lunar Eclipse HDR with the help of the TK9 Multi-Mask Panel. It took an attempt or two but we finally did it :)
3. Content Aware Fill with Cloning when extending your canvas.
4. Finally, a few tips on Lightroom file management.
Today we discussed what makes a balanced image and what that even means. Do we always want our image to be balanced and if not then why not?
Also, we addressed a few questions:
1. The problem of getting banding when creating a black and white sky from the Gradient Adjustment Layer. We never solved the problem and Sharon will look into it for next week.
2. Creating a composite of multiple solar eclipse images. We also tried to come up with an original composition. To be continued for next week where Sharon will create an HDR manually for multiple exposures.
3. When using the script for Image Stacking -> load the images as a stack into Photoshop – Do NOT select the layers, just leave it as is with the top layer highlighted -> now run the script.
4. Why halos happen and how to get rid of them in Photoshop.
Questions Addressed:
1. Fixing blemishes such as dust spots on the sensor with the clone tool, spot brush, or healing brush. Why it is best to place all your corrections on a separate empty layer.
2. Fancy footwork with Vector Masks. How to inverse, intersect and vector masks. We did our best but still need to research this topic.
3. Fine adjustments of masks with blending modes of the brush. Similar to dodging and burning, using different brush blend modes to refine a non-binary mask to a binary one.
Questions Addressed:
1. Dodge and Burn Tool - to use or not to use?
2. Setting up your Photoshop Workspace.
3. Selective Coloring on the Nik Silver Efex Pro - Using Control Points.
4. Can you save Paths in a Tiff file?
5. Creating Custom Gradients, from a Swatch of anywhere else.
6. How to search for videos on Sharon's Website, under Patreon Tab - Archive List.
7. Scanning Apps for your phone.
8. Touching up Stephen's Image
9. Shooting tall buildings...the struggles
Questions Addressed:
1. How to blur a background and blend in the subject.
2. Why the direction of a Path Blur (the arrow) IS important.
3. Working with Gradients and vector Masks.
4. Customizing your own Gradients with colours of your choosing.
5. Creating an Action, loading an Action into your Action Menu Panel.
6. We discussed having a session on Infrared Photography....more to come on that topic...
7. Make your own digital Signature.
Questions Addressed:
1. How do the eye droppers work in colorize in the Hue adjustment layer?
2. Using the crop tool in PS to crop to a specific size, say 11 X 14, or 1 X 1 and then adjusting the overall composition within that size limit.
3. Working with composites. Isolating a subject from its background to be placed within another image.
4. How Sharon uses the Curves Adjustment Layer, only one point at a time.
5. Working with two colour spaces (LAB) but using a Smart Object.
Questions Addressed:
1. Adding colour (in groups) to an abstract image with Vector Masks.
2. We explored various Blur Filters.
3. Colour correction to match a sky to water.
Today we discussed an eclectic collection of Topics:
1. When to use a regular mask and a vector mask.
2. The difference between the Gradient Adjustment Layer and the Gradient Tool.
3. Isolation of an object with various Blur Filters.
4. Drones!
and a few other tidbits.
Questions Addressed:
1. Finding the Fly-Outs on the TK9 Panel.
2. Creating a Light Beam from scratch in Photoshop (or making your own light beam brush).
3. Settings on the H&S Adjustment Layer.
4. Flipping a single layer vs. flipping all the image (all layers).
5. Creating highlights on a long exposure sky.
6. Aligning layers for hand-held bracketed shots.
Topics Addressed:
1. Settings of the Pen Tool, how to Invert a Path.
2. Creating Light beams with special brushes. Manipulating the beams - rotation or size and finally adjusting the colour of the beams.
3. We tackled various ways to turn a bright green leaf with water drops into a low-key key image. We tried various ways to blend the edges of the leaf into a black background. After numerous tries of various methods, we finally found a solution!
Topics Discussed:
1. Setting up your Photoshop Workspace
2. Understanding the Brush Tool (especially Opacity and Flow)
3. Colour Swatches and The Solid Colour Adjust Layer
Questions Addressed:
1. How to add depth and gradation to a bridge.
2. Using Gradients and Vector Masks.
3. Selecting the cables of a bridge with the Pen Tool.
4. Selecting the cables of a bridge with the TK9 panel (Luminosity Masks).
5. How to Inverse a Path.
Plus a few more...dive in to find them!
Today we talked a lot about Vector Masks, so if you are looking for a refresher, this is the episode for you!
PLUS, we also talked about:
1. Setting up your fixed Ratio Transformation
2. Understanding all the features within the Properties Panel.
3. The multiple ways to Feather a Selection.
4. How some Adjustment Layers interact with Vector Masks compared to others and a work-around.
in today's session, we addressed quite a few questions:
1. We saw how to use a Vector Mask and When.
2. How to Merge Blend two images.
3. Where to get your texture images for floral composites.
4. How and where to add or remove the grid overlay in Photoshop.
5. We saw a few different ways to straighten your buildings, Camera raw and Adaptive Wide Angle.
6. On this topic, we also saw how to rotate your image sideways rather than up or down.
7. Lastly, we saw how to create a mask through your channels.
Phew! quite a lot for one session but hey! it's all in the recording :)
Today we learned:
1. How to create a custom brush.
2. Change the properties of the brush to our liking and/or needs.
3. Create our own light ray beams.
4. We discussed when to use Gradients.
5. and lastly, we saw how to use the Blend-if feature and when it would be best used.
Questions Addressed:
1. We talked about the problems with the current PS version 25.0 and showed how to install an older version of PS.
2. Sharon demonstrated how to import skies of your own into the Sky Replacement feature and place them in your own custom folder.
3. Post-processing Josh's image by adding tone and depth as well as Sky Replacement.
4. How to add light beams with a brush. We will continue to explore this feature in the next session.
Questions Addressed:
1. The difference between the new 2023 Gradient Tool to the Classic Gradient. Also, the difference between the Foreground to Background Gradient setting to the Foreground to Transparent.
2. Why and how to use a Stamp Layer.
3. Image critique of Marlene's Graveyard image.
4. How to change Cyan to Blue.
5. A few more tidbits!
As in the title, we discussed the basic principles of Aperture, Shutter Speed, and ISO in determining the amount of light entering the camera plus the properties of each one in determining the look of your image.
We also discussed how to use a polarizer and when.
Additionally, we addressed a few questions:
1. Adding a solid Colour Adjustment Layer, specifically in making your sky black.
2. Apps for Photographers - The Photographers Ephemeris and a Tide Table App - Tides.
Questions Addressed:
1. Improving Kahsia's image of 'Looking Up'. Working with Masks to eliminate buildings and bring in a new sky. We also saw how to work with Groups to replace a sky.
2. Enhancing Cindy's Blurred Seascape. We improved the composition and added some colour with a few more additional touches.
3. How to use Instagram to get exposed to new and different Photoshop techniques. How to save a Collection on Instagram plus a few influencers to follow.
Questions Addressed:
1. How to add more than one option to Open/Edit In from Lightroom to Photoshop.
2. Exploring a little more options or lack of options of Photoshop Generative Fill.
3. Adding/subtracting area within your frame to enhance cropping composition.
4. Fine tuning of straightening an image.
Questions Addressed:
1. Understanding the Histogram
2. How to use the Level and Curves Adjustment Layers.
3. Tweaking Carol Hoffecker's image by mirroring an image.
4. Increasing Tonal Range in an image.
Questions Addressed:
1. How to use the TK8 Panel for creating a pencil sketch, colour and B&W.
2. How to use Control Points within the Nik Software.
3. Docking a Menu Panel in your workshop.
4. Using the Hue and Saturation to sample a colour.
5. Using the Neural Filters to create a Depth of Field Blur.
6. Straightening a building and filling in the lost edges with the PS Beta Generative Fill.
Questions Addressed:
1. Moving and panning within the Photoshop Workspace.
2. Darkening colours with eth Luminosity Mask TK8 Panel - Color Grading.
3. Enhancing Stephen Dunn's image 'Morror, Morror on the Wall'.
4. A failed attempt at selecting in-between driftwood...
5. Changing the Blending Mode of a Curves Adjust Layer to prevent colour distortion.
6. Starting the conversation on the Mac's Color Monitor Calibration.
Questions Addressed:
1. How to change the default setting of a file opening in PS Beta rather than regular PS (on a Mac).
2. Working with Path, Vector Masks, Blending Modes, and Groups.
3. Using the Gradient Adjustment Layer to create transitions of colour.
4. Resizing images in PS
5. Changing the colour of a background in an image.
6. Warping
and a few more tips and tricks!
Today we continued to work on Susan Langer's Denver Art Museum Image.
We saw a few things:
1. The use of the Pen Tool with Gradients and Vector Masks.
2. Working with a Vector Mask as a mask to a folder/group.
3. How to create multiple versions of one image in a single PSD file using ONE Pixel layer and multiple folders in which each folder contains a different version of post-processing the image.
Today we started post-processing Susan Langer's image of the Denver Art Museum.
We saw techniques for 'cleanup", how to use Gradients in conjunction with Vector Masks, and lastly, we saw how to create two different versions of your image, one in colour and one in B&W.
Next SHOP TALK we will continue to see two different post-processing visions.
Questions Addressed:
1. Fine detailing of sky replacement masks. We combined. We added a temporary saturation adjustment layer to make the masking easier and then combined two masks together with the aid of the TK8 Luminosity Masks Panel and Channels.
2. Enhancing gradients. Create contrast with brights and shadows and follow the rule that the eye always goes to the bright part of the image first.
3. Using the Blending Modes of the Brush Tool to enhance a mask.
4. Creating a Path from the Polygonal Lasso Tool.
Questions Addressed:
1. Saving a Color Space
2. Resizing for printing
3. Blending multiple layers with the aid of masks
4. What happens to your adjustment layers when you expand your canvas
Plus quite a bit of Shop Talk!
Questions:
1. various ways to correct lens distortion.
2. Expanding canvas with Content-Aware Scale.
3. How to protect a Subject/Selection when scaling/stretching.
4. Working with the Image Stacking Script and adding an additional layer to the stack.
5. The difference between, Save As, Save as a Copy, and opening a Raw file as a Smart Object or a regular file.
And as usual, a few more tidbits :)
Questions Addressed:
1. Richard Gold shared with us how he created his Two Colour blurred image (as in screenshot).
2. We saw how to add fog to an image.
3. Enhancing tones and sharpness and artificially creating a shallow depth of field.
4. The difference between various blur filters.
5. How to remove halos.
- Looking at behind the scenes of creating Mind Games - Fern
- Expanding a canvas.
- Creating a Mirrored Image.
- Understanding the Gradient Map.
- Intersecting intricate selections.
Continuing our Mind Game Series to see the Before to After of Twirl.
We saw Masking, Warping, Luminosity Masks, and some final finessing!
Today we took a step deeper into the Mind Games Series and continued to see the complexities of the post-processing that when into creating the image 'Curve'.
Also, we had time to see how Sharon created another image in her Oculus Abstract series.
Finally, we clarified the concept and importance of how and why to create a Merged/Stamp Layer.
Today we continued our Mind Games series and saw how we added colour to an already existing Black and White image.
- We saw how to create folders with Vector Masks for multiple adjustments.
- We saw the difference between the Solid Color Adjustment layer to the Hue and Saturation Relative vs. Absolute colour adjustments.
Also...as part of Shop Talk, we saw how the benefits of opening a Raw file into Photoshop as a Smart Object. And finally, we say how to darken a foreground using the Curve Adjustment layer and the Gradient Tool.
Today we saw how Sharon created the first of her Mind Games series in B&W.
- The importance of having a vision so you know what to work towards in Photoshop.
- Working with portions of a structure. - Working with groups.
- Making selective gradient adjustments to a structural element.
- Lastly, we saw how to combine the Image Stacking technique to create a multiple-exposure look for an architectural abstract image! If you wish to follow along and practice the material explained here, please download the jpg file from this link. Sharon will address questions in the next Shop Talk session: LINK AVAILABLE ON PATREON
- Sharon's workflow with Fine Management.
- Working with Lightroom and Photoshop while maintaining your layers in a psd file.
In this Session, we dictated half the time to understand further the Luminosity Masks TK8 Panel. We saw how to see the result of our LM in real time on an Adjustment Layer as opposed to what we have done so far of first creating a LM and then exporting it to an Adjustment Layer.
Also, we had time to address your questions:
1. Warping and working with duplicated layers.
2. Image Stacking Composition feedback.
3. "Skin Grafting" - taking textures and details from your existing pixel layer and applying it to a different area within the image.
Questions Addressed: 1. How to enlarge a building within reason. 2. Adding a Motion Blur to a moving car to give it a sense of motion. 3. Creating reflections on a subject that doesn't have a horizontal horizon. 4. Cloning and rotating. 5. Using the Neural to match a colour tone from one image to another. Plus...a few other tid bits :)
Continuing to understand how the TK8 Panel and Luminosity Masks work.
We saw:
1. How to use the Color Gradient
2. How to use the Luminosity Masks for HDR (bracketed) images, and
3. How to Mask to Mask. Intersecting selections via the TK8 panel. Selecting a very specific area within the entire Luminosity Mask without having to use the black brush to eliminate unnecessary details.
TK8 Panel Made Simple!
The best tutorial session to start out with when tackling the Luminosity Mask Panels.
In this session:
1. Defining and understanding what a Luminosity Mask is.
2. Clarifying and defining the areas of use within the TK8 Multi-Mask Panel.
3. A simple 3 Step Algorithm to create a Luminosity Mask Panel, and
4. Showed examples throughout the session on how to implement the use of the Panel.
Questions Answered:
1. How to Inverse a Vector Mask
2. Can you Crop one layer without affecting the entire file?
3. Selectively removing Colour residue from an image.
4. Why and when to create a Stamp (MERGED) Layer?
5. Creating a Path from a Selection.
6. How to control the amount of Anchor Points created in the Path from Selection.
Plus more tips and tricks :)
MULTIMEDIA PART II
- Q&A from PART I Video.
- Printing on various mediums.
- Using and applying gold leaf.
- Using metallic paint.
- Creating reproductions of your artwork.
- Embellishing your reproductions.
Questions:
1. We reviewed Ally's image for Mainly Monotone
2 We asked what is a stamp layer and how to create one.
3. We failed to create a quick and easy way to create a pencil sketch (outline) out of a photograph. For the life of me, I could not remember how I did it in the past but I did find this very easy (and quick) to follow video tutorial by Anthony Morganti:
https://www.youtube.com/watch?v=PcfddcE2xvs
4. Lastly, we saw how to change the colour of your black and white image. We selectively added colour to architectural images using the Gradient Map.
Today we split the SHOP TEALK session into two halves. We started with your questions:
1. How to extend a canvas and flip an image?
2. How to best select a sky?
3. How to darken a sky, and
4. How would I challenge Richard's image with strips and make it better?
We then proceeded to see how Sharon post-processed some of her architectural images. The vision that guided her into going into PS and then the execution.
Everything you want and need to know on creating your own greetings cards from your photography.
- How to set up the card stock in Photoshop.
- How to set up your image for printing.
- Where to print and where to buy card stock.
- Pairing the right image to the right caption.
-How and where to sell your cards.
And much much more!
Today we divided the session into one half Architectural Series in which we continued to post-process the image from the Palace of the Arts in valencia. However, we broke off and saw the vision and direction I will take in post-processing other images:
1. The Zurich Law Library
2. The Train Station in Liege-Guillemins (Belgium)
We then continued to answer your post-processing questions as part of the original SHOP TALK:
1. How to smoothen out rough concrete textures
Today we continued seeing the best options and methods for replacing a sky and fixing tie-ins. With a Stamp layer and cloning or with a different sky and vector mask.
As also saw how to create a stacked image from multiple individual shots and then tweaking to enhance. We used the Milwaukee Art Museum as an example.
In today's Architectural Series we continued to work on the image from the City of Arts and Science in Valencia and saw the importance of
1. Preparing your image. Be it fixing the water, the sky and 'cleaning it from clutter'. Sharon demonstrated her 'Skin Grafting' technique of using texture from one area of the image and applying it to the other.
2. When working with Gradients, why it is immensely valuable to work in conjunction with Vector Masks and Regular Masks. We demonstrated with and without.
3. We started brainstorming if to keep the image in colour or convert it to black and white. What are the pros and cons?
The first in the coming session of the Architectural Series. Sharon will walk through her initial raw image selection, and thought process of which image makes the ct and then we delve into the details of the Photoshop post-processing.
In this session, Sharon selected an image from The City of Arts and Science Valencia, Spain. She explained her vision when in the field taking the shot and what guided her in selecting the winning image. Then she proceeded with the post-processing selections with the Pen Tool and adjusted the composition to aid and accentuate her vision. Let's see what she will come up with in the next session!
ps. we also saw how to reset your Gradient Tool in case it's acting up.
Questions:
1. How to set up the Colour Space in photoshop and in Lightroom
2. Sharon's advice on how to develop 'Vision' for your images.
3. Warping and distorting a staircase to create fine art.
4. Cleaning up unwanted areas with Content-Aware Fill.
5. Creating Artistic Multiple Exposures through Smart Objects.
6. A few Masking Tops and more tidbits.
Questions Answered:
1. Various forms of Saving files in Photoshop.
2. Working back and forth between Lightroom and Photoshop.
3. Post-processing low-key colour images.
4. Long Exposure post processing.
and some fun chit chat :)
Questions:
From Venice Italy! we talked about:
1. How to fix exposure differences in a Long Exposure image.
2. Filters, adapters, and more for Long Exposure.
3. What is the best travel tripod and backpack...
QUESTIONS:
Creating a low key image
Working with Vector Masks and regular Layer Masks
Using the Quick Mask
Diane explained her process of how she creates her paper images on a flatbed scanner.
And most importantly, we had some very interesting chit chat ;-)
Questions:
1. Clarifying when and how to use the Gradient Adjust Layer and the Gradient Tool.
2. "Cloning" using an existing layer by shifting it over and Masking.
2. Changing colours.
3. Adding a Gradient Adjustment Layer to smooth out water on a long exposure.
QUESTIONS:
1. How to add a glow to windows
2. Creating a line/shape or stroking a Path to create a line.
3. How to reset your tool when it's not performing as you think it should
4. A little summary on using a regular mask with a vector mask.
Questions Answered:
-Resizing Images.
-Increase/decrease the intensity of a Gradient Mask.
-Selective lighting to enhance shadows using the Camera Raw Filter and Viveza.
-adding smoke to an image to an image and adjusting the colouring.
-Understanding 'clipped' pixels (blown out or underexposed)
-Shortcuts to changing the hardness and size of your Bush Tool.
Today we talked about:
1. Focus Stacking and image alignment
2. Straightening vertical lines due to wide-angle lens distortion.
3. How to rotate, mirror and more with the clone tool.
4. Cleaning up images with Sharon's 'Skin Grafting' technique ;)
And a few other tips!
*Changing the composition of an image by eliminating the redundant middle part.
*Ins and Outs of Cloning.
*Black and White Conversions in Photoshop.
In today's session, we got all caught up with comparing our different techniques of photographing floral composites.
-Adding colour to skies and foliage.
-Aligning objects perfectly in PS.
-And much more.
Adding a shadow, creating composites, adjusting tonality, replacing skies and file management (sort of).
Also check YouTube for Jesus Rameriz Photoshop Training Channel for creating shadows: https://www.youtube.com/watch?v=IxQfl7yiRiE
1. Creating a Color Swatch
2. Understanding the Solid Fill Adjustment layer and the,
3. Hue and Saturation Adjustment Layer (Colorize ON or OFF).
Today we learned about:
Luminosity Masks (LM), adding canvas and colour adjustments.
Also regarding LM, Sharon will send out an action, instructions on how to install it are in this video.
- Refining artificially added snow.
- Vector Masks and composites.
- Composites with Blurred and Sharp Images.
- Replacing Skies with Blend If.
- Selective Colourization using the Color Adjustment Layer vs. the Hue and Saturation Adjustment Layer.
- Masking, cloning and the RAW file.
All this and more :)
Today we talked about Smart Objects, the Pen Tool and Paths as well as some other tidbits of valuable information.
-Changing a background colour.
-Using the Magic Wand to make a selection.
-Editing an image for Low Key results.
- Adding a Gradient Adjustment Layer and modifying the colours.
-Image critique for black and white conversion.
-Using Silver Efex Pro2
- ND Filter Comparison between the magnetic Kase Filters to the B+W NF Filters.
- A deeper look into the SEP2 Control Points for selective editing and colourization.
- A few more odds and ends :)
Today we had a look at:
1. Creating images with uniform colours
2. Sky Replacement Filter
3. Different types of selections and how they work.
4. Making Masks with Channels
QUESTIONS ANSWERED:
1. Working with composites - architectural staircase.
2. Working with pixel layers and masks to create composites.
3. Tips on Image Stacking images.
4. Saving and resizing in Photoshop.
5. Using the Pen Tool.
Straightening Architectural images for lens distortion.
QUESTIONS ANSWERED:
1. How to use Content-Aware Fill.
2. Sperening with Nik's Define filter.
3. Black and White conversions.
4. Creating your own Brush.
5. Creating a composite image.
QUESTIONS ANSWERED:
1. What are Vector Masks and how do they work?
2. Mirroring an image.
3. Creating consistent colour presets (Lookup Tables)
4. Staking Images
QUESTIONS ANSWERED:
1. Review of drawing lines - both straight and freeform lines. Also, the best way to put a line frame around an image.
2. I want to make Vic (the man with a megaphone wearing a yellow hat) stand out more as the subject without degrading the people and location in the image. Would dodge & burn technique, or making Vic sharper and brighter work? After processing, it's ok to still look like a grab-shot, but not to look "processed".
3. What is the best way to change the colour in selective areas of an image where it appears in several locations?
4. Can you please demonstrate how to us how to use the content-aware fill?
QUESTIONS ANSWERED:
1. Removing artifacts that appear on an outline of an image in the RAW file of your image.
2. Adding textures or other images to wrap around buildings.
3. When you are filling in an area of you image with colour how do you ensure it stays looking like a photo versus an illustration?
QUESTIONS ANSWERED:
1. Understanding Smart Objects
2. Application of the Reflected Gradient Tool
3. Useful tips for expanding your Canvas.
4. How to use the Content-Aware Fill
5. Feathering your Mask
Plus a few more tips and tricks!
QUESTIONS ADDRESSED:
Given a choice of A) adjusting one image to bring out a darker section using various masks and adjustment or B) combining two different images of the same location exposed to have each of the two sections in (close to) ideal settings,
Which is the best or easiest method to proceed?
What criteria might be used to determine which of each option might be better?
How to change a background colour of an image? Do you start with a coloured background and then superimpose the image? Or should you start with the image and isolate the background? e.g I have an image of a flower and want to change the background colour.
When I crop with ‘delete cropped pixels’ OFF (unchecked). I see the cropped image and the pixels are hidden, so I can re-crop at any point, however, the background layer image is also cropped, even though the background layer is locked.
How can I see the original background layer and see the cropped layer in the layer stack?
Some of the questions addressed in this session:
1. How do you put images into folders and
2. How do you go back to the original image and edit it differently and then put that into a folder?
4. Maybe a totally different question but how do you display all 3 images on the monitor? I assume that we will be doing this in our class for the BNW assignment.
I'm interested in getting a better understanding of when to use the gradient masks, I understand they are masks but when looking at an image.. when do I decided to engage the different masks to create a result... or is it always try one out... if it doesn't work try the next one ...etc. Do you in time just gain a clear understanding of when it's important to use a specific mask..
How to import a second image into PS to be used as a background layer to replace the original background in a photo? For example, placing a cherry tree, in full blossom, in a barren desert with a bright crystal clear blue sky. Thanks. (I have neither in my library or I would have included one or both in a submission).
What is the best way to custom resize images to retain the original dimensions? I increased the canvas size to expand part of the image but now I want to go to the original size and eliminate extraneous information. Hope this makes sense.
Do you have suggestions about how to approach taking images of vehicles that are normally moving that you would then combine in a stacked image using PS. I'm thinking of classic cars, trolleys or large boats. My question isn't so much about processing the images in PS, but more about gathering the raw material. I'm thinking it would be best to focus on these types of subjects when they are stationary, but have you ever done it with vehicles that are moving?
What are the steps to creating a smart object?
Lens Correction options for Architectural Photography
Questions addressed in this session plus much much more:
* if I want to add an element say a cloud or an umbrella into an image, is it best to add the entire picture of the cloud which may contain other clouds, or should I crop the cloud I specifically want to use smaller and bring in the cropped cloud into the image. What are the advantages or disadvantages in cropping and/or is there a better way to add specific subjects to an image? Surely demonstrating this might be more impactful.
* What is the relationship between Camera Raw and Photoshop? I have done all my initial editing in Lightroom Classic only using Photoshop for more detailed editing as I become more familiar and competent with the PS platform.
*If you are working on a series of images, what is the best way within Photoshop to ensure they are all the same size? I have three images right now and have taken the pixel measurements from one, and using the Image Size tool, typed in those measurements for the other two. So far it has worked out but I don't really understand what is happening.
In Lightroom, I know you can set the aspect ratio or size and then move your image around within that frame to get the best composition, but I don't know how to do that in Photoshop.
*Automated Selection Methods - ie channel masking and luminosity masking that require a small amount of Pen Tool work.
BEFORE to AFTER
Monthly one-hour sessions in which Sharon will walk through her Photoshop post-processing workflow
In this Part 2 session, participants submitted their images after applying the technique Sharon taught in Part 1. We all chimed in and gave our feedback.
In this Before to After session, Sharon takes you behind the scenes to reveal the full creative process behind this striking image. The beautiful motion blur was achieved entirely in-camera, using intentional movement and long exposure techniques to create a dreamy, abstract effect. But the transformation didn’t stop there—additional magic was added in post-processing, including the selective introduction of color and the subtle incorporation of figures to enhance the narrative and emotional depth. This session is a deep dive into both technical skill and artistic vision, and it’s one you definitely won’t want to miss!
Photoshop skills required:
Basic Masking, Clipping Masks and Gradients are optional.
Today we reviewed the creative images participants made with this technique. Amazing new and different creative directions - Bravo to all the submitters. We saw ways in which we can enhance the images and softly add a subject to the background.
We didn't have time to get to all the images so next week we will continue and see what other new images you all can come up with!
In this Before to After session, Sharon explained the techniques and process of creating stunning, warped, fantasy-like realities. This imaginative and exciting genre is a joy to explore, and everyone is welcome to join!
A basic to intermediate understanding of Photoshop—specifically layers, masks, and smart objects—is recommended. However, if you're unfamiliar with these concepts, don't worry! Sharon covered the essentials to help you follow along.
Next week, we will review images that participants created using this technique. Please upload your PSD files to the ShopTalk folder.
Unveiling the secret behind this iconic airplane image! Discover the surprising elements that came together to create this striking composite—a masterful blend of simplicity and power, crafted from the most unexpected components.
The photographic theme of symmetry versus asymmetry delves into how we perceive balance and visual appeal. Humans are naturally drawn to the aesthetics of symmetry, as it conveys harmony, stability, and order—qualities that are inherently pleasing to the mind. Symmetrical compositions often feel elegant and timeless, offering a sense of calm.
However, asymmetry introduces complexity and unpredictability, which can captivate the viewer on a deeper level. By breaking conventional patterns, asymmetrical images challenge our expectations, sparking curiosity and emotional engagement. Together, these contrasting approaches highlight the interplay between simplicity and complexity, offering rich opportunities for artistic expression.
Join us for this captivating topic to learn, converse, and analyze through various case studies images with Symmetry vs. A-Symmetry!
I was referencing Prof. Ramachandran. You can watch his presentation here: https://www.youtube.com/watch?v=7ZTvHqM-_jE&t=2335s
Enjoy!
This session will tie in quite a few techniques and tools we have learned about over the past months:
Working with Layer Comps.
Composites
Slow Shutter for light trails.
Bokeh Lighting
Warping for artistic pizazz!
This session is for EVERYONE!
We will be discussing Vision, aesthetic balance, tones and geometry. And, how can we not go into Photoshop and see how to turn a Good image into a Great one!
We discussed Vision and what to 'See' when you are out in the field, what to look for. We delved into Photoshop and saw how to Clean Up an image, create Selective Multiple Exposures and of course, some Vector Masks as well.
Additionally, we discussed how to adjust an image with multiple shapes and a little refresher on some Pen Tool techniques.
This session is for EVERYONE!
I will primarily be explaining composition, but we might step into Photoshop for a bit too….
I will go over composition of simplistic abstracts, how to include shapes in your frame vs. empty surfaces.
When the location is too busy, when do we go for abstract and how and if we embrace the business, how should it be done?
How to take and process an indoor pano!
Emaple images from the Toronto AGO Staircase, Toronto Reference Library and Chicago Rookery Building.
This session was heavy on technical tools.
1. How to create overlapping Paths.
2. Working with vector Masks and inverting a VM from an existing VM.
3. Combining the use of Luminosity Masks with regular masks and vector masks.
4. Working with Notes to save your comments and notes within a PS file.
5. How to save a file with various layer configurations.
In this session, I will take you by the hand and walk you through the Art Gallery of Ontario (AGO). It is a breathtaking and fascinating building with a wooden staircase that I found mesmerizing. I was determined to capture this building in a series of abstracts and that is what I will show in this session.
Part of my challenge in this series was the colour adjustments, to keep the original wood or to display the series in B&W to emphasize form. I ended up marrying the two and I will demonstrate how I did that.
Pre-requisite post-processing knowledge:
An artistic eye that appreciates curves and geometry!
Sharon’s usual, Pen tool, Gradients and Vector Masks.
Please join me on my journey to exercise my abstract muscles!
In this session, I explained how IR photography works, what you need to take IR images - various conversion types, and where to get it done.
We also saw the step-by-step process you need to do in post to White Balance correct your image - no need for any purchases - Adobe has a free White Balance correction software.
You can download the DNG Profile Editor Here: https://helpx.adobe.com/ca/camera-raw/digital-negative.html#DNGProfileEditorSeptember2012
Pre-requisite post-processing knowledge:
This session explained some optics and physics but you can leave your diploma at home, we simplified everything, and if you want to let this part go past you, that’s okay too.
The White Balable correction needed for IR Photography can be done in Lightroom of Camera Raw. I started in LR and will continue with regular post-processing in Photoshop.
I explored both colour and black-and-white post-processing options.
In this session, I reviewed the images I took at the Cleveland Clinic in Las Vegas. What guided me in my composition, vision, and then selecting the images for a series.
Afterward, we stepped into Photoshop and saw the step-by-step post-processing of some images.
Pre-requisite post-processing knowledge:
This session focuses on vision and intent in creating a series so everyone is welcome, no need to have any post-processing knowledge.
But….as we proceeded, Sharon shared with you the details of the Pen Tool, Gradients, and Vector Masks that enabled some of the final image(s)
This session is a bit more advanced as we will work with intricate selections for accentuating reflections of bridges on the water for a crisp black-and-white look.
We will look at the original image, see what my game plan was, and how I proceeded with the post-processing.
Even though we will touch on some advanced techniques, beginners will be able to take away key principles.
Pre-requisite post-processing knowledge:
Basic understanding of Photoshop Layers and masks.
The Pen Tool and Gradients
This session is ideal for beginners and advanced. But especially, for those looking to step up their black-and-white post-processing.
Vision, vision, vision! Sharon will go through her camera roll and show you what she saw in her mind’s eye and what were the factors in sieving through the images to narrow it down to one.
Even though we will touch some advanced techniques, beginners will be able to take away key principles.
In-Post: we will cover: lens correction, HDR, Noise Reduction for low light, tonal grading, luminosity masks, vector masks and even adding a light beam!
Pre-requisite post-processing knowledge:
Basic understanding of Photoshop Layers and masks.
The Pen Tool and gradients
Learning how to create artistic night shots with the technique of Bokeh Lighting. In this session, we will combine multiple night exposures to create layers of streaks, illumination, and colour!
Pre-requisite post-processing knowledge:
This session is ideal for beginners or advanced. But especially, for those looking to step up their images. It can be a landscape or architectural scene. We all witnessed an occasion where we didn’t want a wide angle to minimize our details yet couldn’t fit everything we wanted into one frame. In this session, Sharon will walk you through her experience with creating vertical panos to capture a scene with highest resolution and purest perspective.
This session isn’t going to be too heavy on the technicalities, it is primarily about principles.
Sky Replacement - everything you need to know.
Pre-requisite post-processing knowledge:
Basic understanding of Photoshop Layers and masks.
This is a great session to ask all your Image Stacking Questions
and see how Sharon tackles and challenges a location.
Why photograph a location in this technique rather than another?
In-camera tips, what to include in your frame and what to exclude?
In-Post: we will cover selective masking and enhancing the image with filters
Pre-requisite post-processing knowledge:
Basic understanding of Photoshop Layers and masks.
Image Stacking Technique. This session will NOT be a workshop-style session on Image Stacking. The fundamental principles will not be covered. It is, however, meant to enhance and further the understanding of those who have already taken this Workshop.
In this session of this series, we explored the world of Abstracts. Seeing shapes and shades of white.
We tackled two images that I took during the 2023 NY Fine Art Architectural Workshop. On the second day of the workshop, we took advantage of the soft sunrise light to capture abstracts and long exposures of the shapes created underneath the pillars that create the foundation of Little Island. The light was soft enough not to blow out the white concrete of the structure.
Post-processing we covered: Basic and Intermediate understanding of Photoshop Layers and masks. We saw the use of:
1. The Pen Tool in aiding cloning.
2. Creating gradients with the Brush Tool as well as the Gradient Tool.
3. The Gradient Adjustment Layer.
4. Combing partial opacity masking for a multiple exposure look.
5. Tips and tricks in ‘cleaning up’ an image.
In the first session of this series, we dip our toes into the post-processing of a sunrise long exposure. You don’t need to be a seasoned long exposure photographer to know the challenges the fickle light of sunrise can create. In this session, we learn how to set your camera settings, which ND filters to use and most importantly, how to process the image.
The scene we will tackle is from the 2023 NY Fine Art Architectural Workshop Sharon taught this past October. We were blessed with beautiful light illuminating the buildings in Manhattan, however, the clouds disappointed. Together in this session we will how to fix that!
Pre-requisite post-processing knowledge:
Basic understanding of Photoshop Layers and masks. The heavy lifting in the post-processing was done with the use of Control Points in the Viveza Plug-In by DxO.
MORE
Video Tutorials/Great Links/Be a fly on the wall on one of Sharon’s One-on-One Sessions.
We recently discussed the Path Blur and the question arouse if we can assign a different degree of blur to each Path Blur. Well guys...I investigated and couldn't find any information on how to do that; everywhere I looked, the adjustments are global and apply to all Path Blurs.
This video is a great demonstration by Greg Benz explaining how it works in case you missed our previous session:
Are you using movement to tell stories with your photos? In this demo, I'll show you how to use the Path Blur filter in Photoshop to bring your photos to life.
Key segments:
0:00 Intro
0:40 Overview of exposure blending used to prep the image
1:52 Step #1: Create clone stamp (to be blurred)
2:10 [demo of why motion blur won't work on this image]
3:15 Step #2: Convert to smart object
3:42 Step #3: Path blur
11:25 Step #4: Add layer mask to control where blur is applied
14:33 Step #5: Edit smart object to get rid of blur artifacts
17:23 Comparison of Motion vs Path Blur, and Recap of the process
Drawing on the insights of leading thinkers in the field of creativity, Sharon will give a presentation about the Creative Process and the different Mindsets required for each phase. The presentation will blend theory as well as examples from Sharon’s own experience and work.
The two books that Sharon references:
Creativity by mihaly Csikszentmihalyi
Your Creative Brain by Shelley Carson
In today's Special Series session, we discussed the ins and outs of the Analog Efex 7 Filter from the Nik Collection. We saw how it adds vintage retro features that are best used for older images, such as images that need a specific vintage 'feel'. Also, it can be used for it's cool texture effects.
Also, we still had some time in the session, so we saw how to create a High Key image in Color!!!
In this session, we saw the uses of the Viviza plug-in. We compared its capabilities with the Photoshop RAW tools to see the difference. We concluded that it is a powerful filter and especially useful for its Structure tool.
Today, we continued to see the works of the Color Efex 7 Filter through participants' submissions. We saw and concluded that the best way to get acquainted with this (overwhelming) filter is to choose a preset and turn the filters of the preset on/off to see the effects. When you come across a filter you like, you can 'favourite' it or make a note to use it in the future.
Thank you David, Judy, and Richard for submitting your images.
Continuing our Series Sessions on Patreon! In this session, Sharon will explain how to work with Color Efex. It is a powerful and intricate filter; we will see how and when it is best used.
In this session, we saw the strengths and weaknesses of the Luminosity Mask selection within the Silver Efex 7. We compared it to the Luminosity Masks of the TK9 Panel and the superiority of the LM selections within the TK9 Panel compared to Silver Efex.
Today we continued to dive into the Silver Efex 7 and see example images for some of you. It was a great reinforcement of tools we discussed last week, plus...we saw what we can do with a Silver Efex layer when we change the blending mode to Luminosity!
Silver Efex 7:
Today we explained (almost) everything Silver Efex. We saw the difference between the new 7 version and the older ones for you to decide if to upgrade and understood most of the bells and whistles the plug-in filter has to offer.
The Silver Efex is one of the most powerful Nik filters and I personally love it!
We saw what global adjustments can do as well as most of the local adjustments.
We finished off the session with sharon encouraging participants to implement today's teachings on their own images and submit for review/critique on the Shop Talk page and folder upload.
Next week we will continue to Part 2 of the Series to review submissions and delve deeper into the filter.
A continuation of Talk-&-Learn #206 on the topic of Staircases. Due to the high volume of submissions for this theme, I have continued showing the post-processing of 8 more images in this special add-on video. Enjoy!
This session is useful for those asking themselves the following questions:
How to best select images for a body of work?
Why do some images belong and others don't?
What to look for and of course, a few tidbits of post-processing.
After viewing this video, please do add to the comments what you think as I would love to incorporate your feedback in my future teachings.
Hunter started working on his architectural images for a competition submission. As I started reviewing his post-processing we saw that Hunter wasn't quite aware of the hows and whys using a Vector Mask vs. a regular Mask). We took a step back and simplified the process so he could get the same result with a more simplified method.
Keep posted for Part II as we take a few steps back and look at the forest rather than the tree by curating which of Hunter's images should be shortlisted and why.
Toby missed the portion on the Pen Tool from the Intermediate Photoshop Workshop. So in this session, I go through the details and technical know-hows of the Pen Tool and answer any of Toby's questions.
If you too have questions or just need a refresher on the intricacies of the Pen Tool, then this recording is for you!
WATCH NOW ON PATREON
Alfred Stieglitz, the grandfather of photography and the gatekeeper to the art scene of the time.
How the first photographers were influenced by the art scene of the time and how in return, the artists were influenced by the camera.
I would like to share with you a podcast from the publisher of Lenswork Publishing, Brook Jensen. In this podcast, Brook elaborates on an article he wrote about what should be the reasons for attending a workshop, what to expect, and what not to expect. I could not agree with what he had to say more. From Lenswork Publishing Podcast #1336 How to Make a Workshop Work.
Art Wolfe's personal story of his inspiration and influence from the world of art on his photography.
Smart Objects are wonderful tools in Photoshop. They enable you to make unlimited changes without losing quality and provide an amazing amount of flexibility. This nondestructive way of working is really the modern workflow for Photoshop. They are also capable of doing a lot more than most people realize. If you don’t really understand Smart Objects, I am going to explain this clearly to you. If you do understand, I’m going to give you 7 tips (or workflows) and show you some things you may not be aware that you can do with Smart Objects, or even in Photoshop.
We take a very expansive view covering over a thousand years of history.
We discuss:
The Romans adopted Christianity, what does it do to art?
The Renaissance and the importance of Formalism.
A detailed look into what is Formalism.
The Enlightenment era and its effect on art.
The Romantic era and its effect on art.
A comprehensive and easy-to-follow tutorial on how to capture a large depth-of-field image for those situations when you can’t set up a tripod for a small aperture opening. This video will walk you through the in-the-field shooting and will follow up in the post-production room to Focal Blend a series of images to create one final sharp hand-held architectural image. Thank you to the gracious Justin Reznick for his permission to share this video.
721 Art Talks Part III Who Decides What Makes Great Art?
An in-depth discussion on the three dimensions we experience life: I, WE, and IT. What that means and how it applies to Art. After understanding these concepts, we can see how we should be judging and appreciating various types of art.
Enjoy!
Is the way we see and create art innate in our human makeup or is subjective to culture and the times in which we live?
What is the common denominator in art throughout history? We will tackle these questions and more.
In this comprehensive video, Sharon walks you through the process of handpainting on your own printed images. We go through understanding what images would make good candidates for this technique, different media types and how to approach your multimedia project.
Also, Sharon shares with you snippet videos of her actual work, the painting process as well as many questions and answers. Where to print and how to prepare your images to be painted on or/and coated with resin.
Tune in on PATREON for PART II as Sharon will answer questions and address gilding and details about pouring resin on your images.
Understanding the fundamentals of the Photoshop Workspace. Everything you need to know to get up and running in Photoshop. The chapter will teach you:
How to open files in PS, understand the concept of panel menus and how to customize them to your liking. a few shortcut keys for ease of work and a few more tidbits.
How to add emotion with light and colour from the experts at Pixar.
I wanted to share with you something I was passionate about since I was a teenager, and that is animation. On the Disney Plus streaming channel there is a series called Inside Pixar - a fountain of creativity if you love the arts. In one of the episodes (short series of about 10 minutes each) they talked about adding emotion through light and colour. I have just uploaded it as a new post. I HIGHLY recommend watching it as so much of what they talk about is relevant to us as artistic photographers.
This One-on-One session with Mallory Kates demonstrates a few essential Photoshop techniques that are never enough to review:
1. When warping a subject, how to deal with the background of the original in the underlying layer.
2. Troubleshooting when a Mask isn't giving you the results you are expecting.
3. Using Blending Modes selectively with a layer and mask to blend in blemishes.
In this video presentation, I walk you through what I see in my mind's eye while on location when shooting the Sundial Bridge Series. How I pre-visualize in the field, and then my workflow in Photoshop.
Learn how to create Time Lapse Slips (seamless or not) in this quick and easy-to-follow video tutorial. Watch till the end to see how to create not just rectangular trips but funky shapes as well.
Thank you Thelma Gill for your beautiful image and in putting in all the hard work in creating it.
This video tutorial will walk you through two very useful tools in Photoshop within a click of a button:
1. When taking multiple images on a tripod, how to add details that are different from one frame to another (like adding the blades of a wind turbine some multiple single images).
2. How to subtract details that are not appearing in all images from one frame to another. Like in a bustling train station where people are moving and are not in the same spot from one frame to another.
Be a fly on the wall in one of Sharon’s One-on-One sessions. Here Sharon meets with Carmen Saunders and provides her with a Portfolio Critique on her Image Stacking work.
In this One-on-One Session with Carmen, we curated which images were “exhibition’ worthy and which should be scrapped. We also saw how Stacked images can be enhanced or recreated from a single image. Plus, a tip or two on how to display and present a body of work in an exhibition.
If you have or haven’t yet taken Sharon Tenenbaum’s Image Stacking Workshop, everyone can find invaluable feedback to take away from this session. Enjoy!
Jesus Ramirez of the Photoshop Training Channel walks you through everything you need to know about working with Groups in Photoshop.
Enjoy!
I have recently sent you a tutorial on Floral Composites and explained there how I fix the outline of my selection when I have a white halo (fringes).
Sam Elogio sent me this video by Jesus Remirez where he uses the Minimize and Maximize filters for correcting fringing issues. Jesus demonstrates how these filters provide more flexibility over Expand and Contract selection. He shows the benefits of the Minimize and Maximize offers:
Real-time view of the change,
Can use decimals, instead of whole numbers, to shrink or increase the mask edge, and
Provides smoother edges.
I HIGHLY recommend watching it! PLUS, there are a few other gems and tips in there that personally wasn't working with that I will start adopting, like the Blur tool.
There is a pdf instructions document attached if you prefer to follow text rather than video. I recommend both :)
Demonstrating the Before to After. A seemingly difficult image with not much potential was transformed. Watch to see how it was done!
Please download the images from the link below if you wish to follow along and post-process interactively.
Hi Everyone,
The LM file is attached here. Please save it somewhere on your computer in a place where you will know where to find it.
Open your PS Actions Panel. Click on the four lines on the top right of the panel and find the file, click open.
Open the Luminosity Masking folder (in the Actions Panel), highlight the row below the folder title and then click on the PLAY icon on the bottom of the panel to run the action.
Detailed instructions are in the SHOP TALK video #15 from Nov. 16, 2021
I personally am not much of a portrait photographer, so when I came across this video tutorial demonstrating How to Pose Female Clients for Flattering Portraits By Dan Havlik I was impressed. This might seem obvious to those of you that are familiar with the subject matter but it was quite illuminating for me.
I highly recommend watching this video by StyleMyPic and bookmarking it for continuous reference. It is jam-packed with VERY important colour theory information. You might not absorb everything he says at first viewing, but slowly more and more will trickle in.
Enjoy!
Hi Everyone,
I just wanted to follow up with a topic we addressed yesterday in the SHOP TALK when Gloria asked about changing background colours. I knew I remembered something with the Gradient Map and I found the tutorial to share with you all. However, keep in mind that this technique works best when you have texture (like what he is demonstrating with lips, nails etc). Regardless, I think you should give it a go!
Also, we talked about selecting the background with the Wand Tool, in the new PS 2021 there is a great Subject Selection. just go to the main menu and from Selection choose ->Subject and see for yourselves. It might not be 100% perfect but I think that it does a better job than the wand or quick selection.
Anyway...please have a look at this video by Sean Tucker - How to Accurately Recolour your Images (using Gradient Maps in Photoshop), and we can discuss more in the next session:
In the last SHOP TALK Cindy asked about matching colours between different images. I originally thought it was through the Lookup Tables in PS but I was wrong!
I found this great tutorial by PHLEARN, I would highly recommend giving it a look and we can actually try it together in the next SHOP TALK session :)
Enjoy,
Sharon






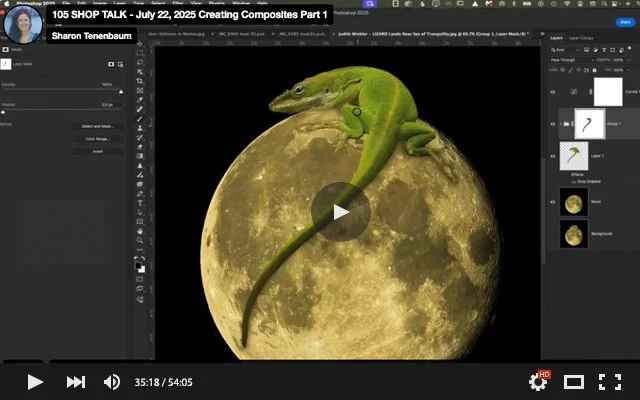
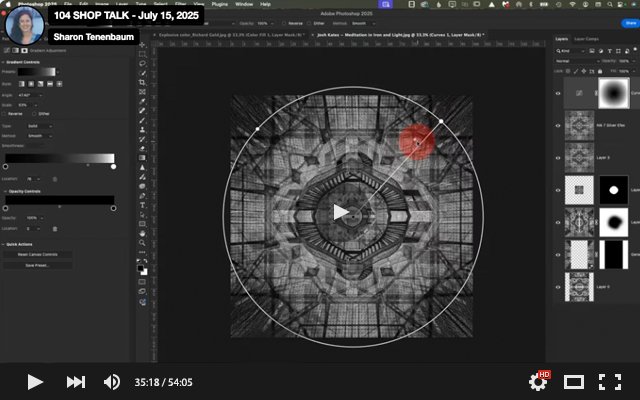
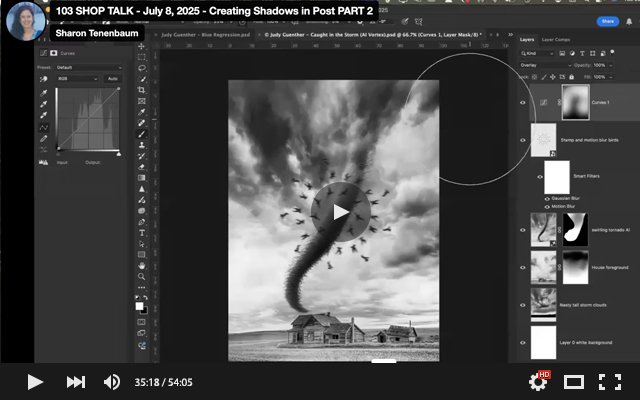
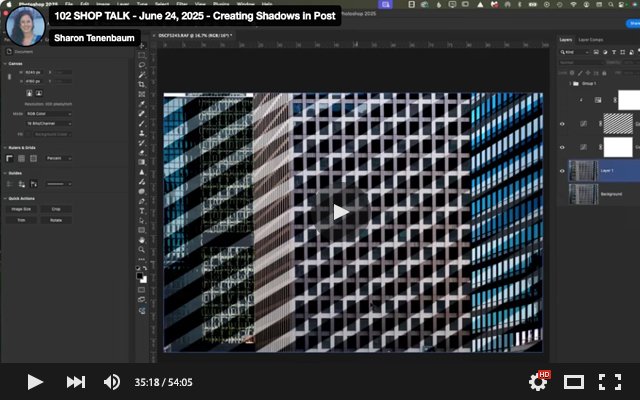



















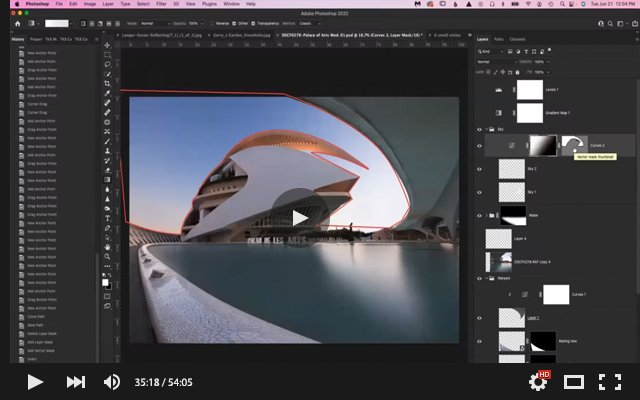



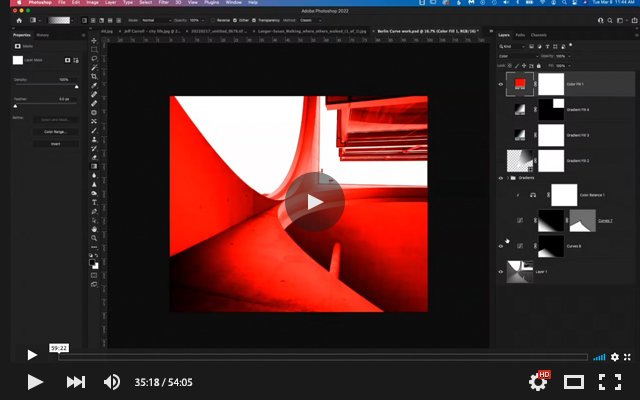
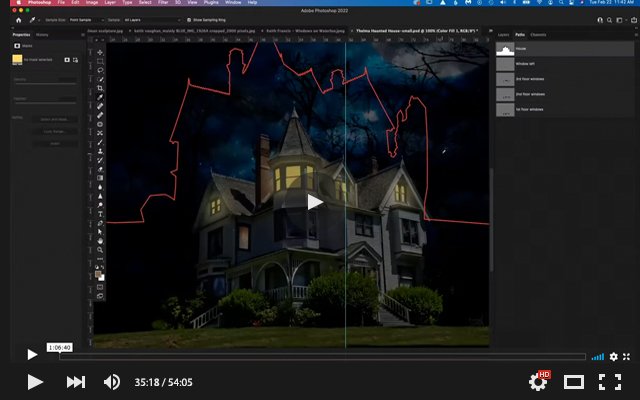







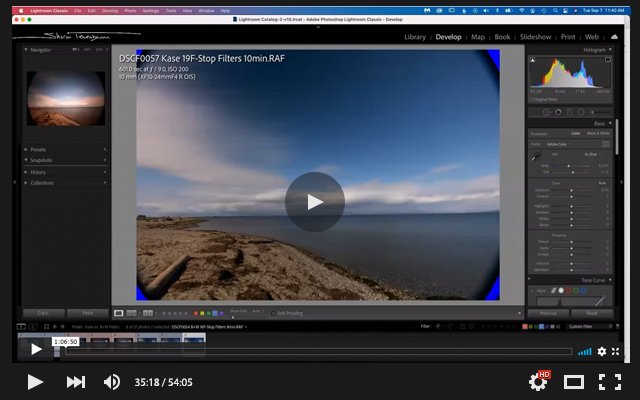

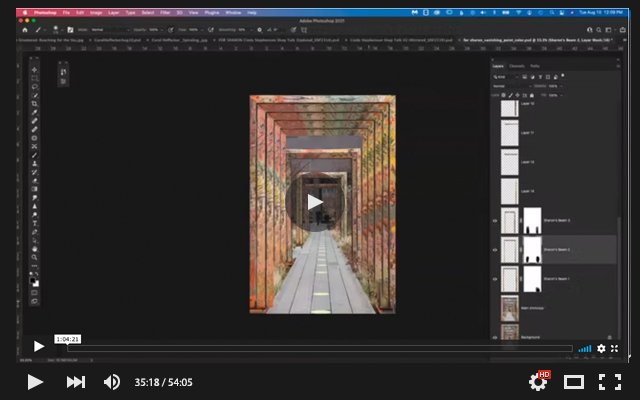


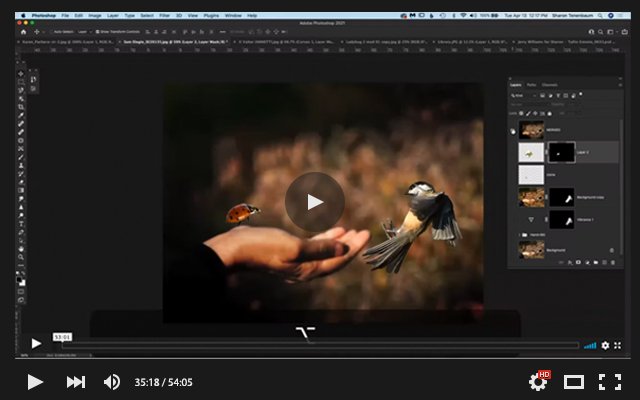


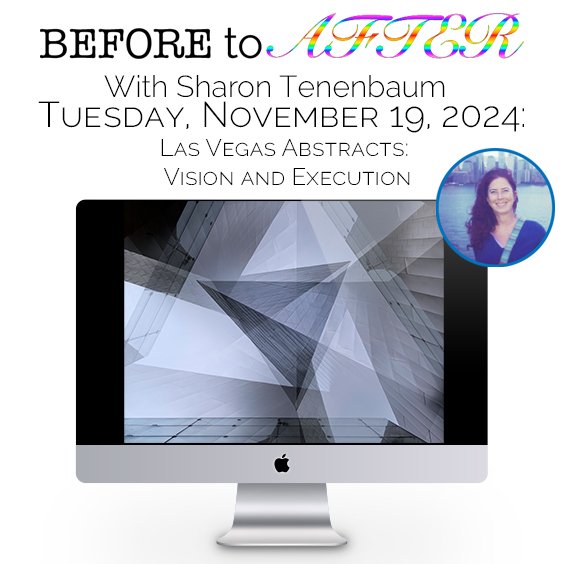


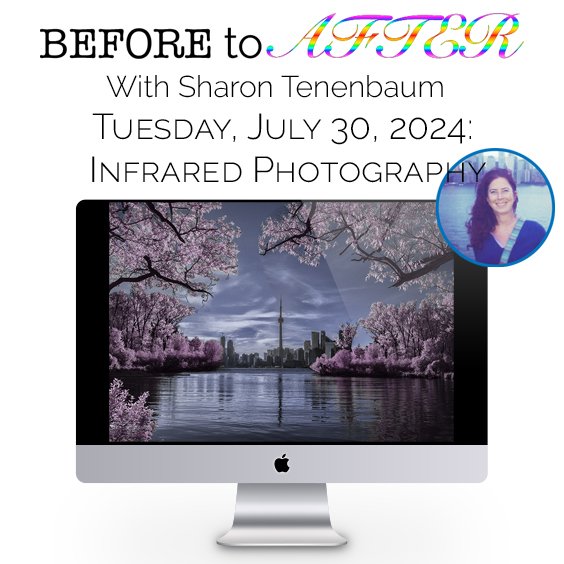
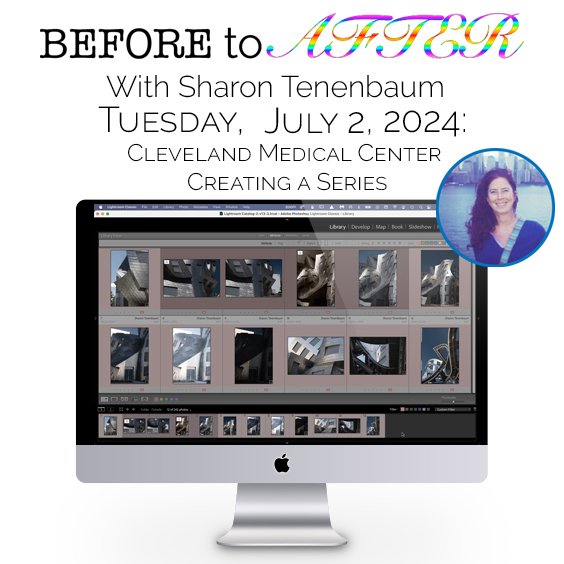
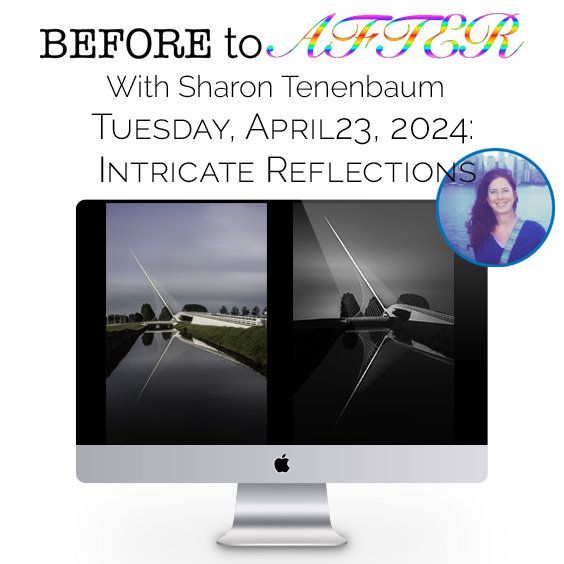


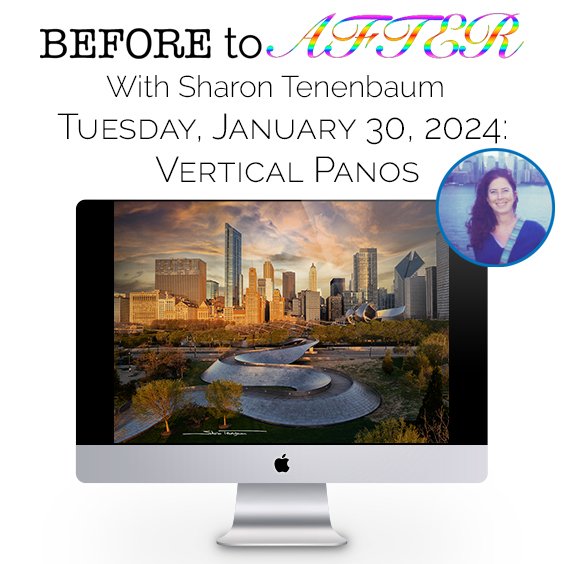

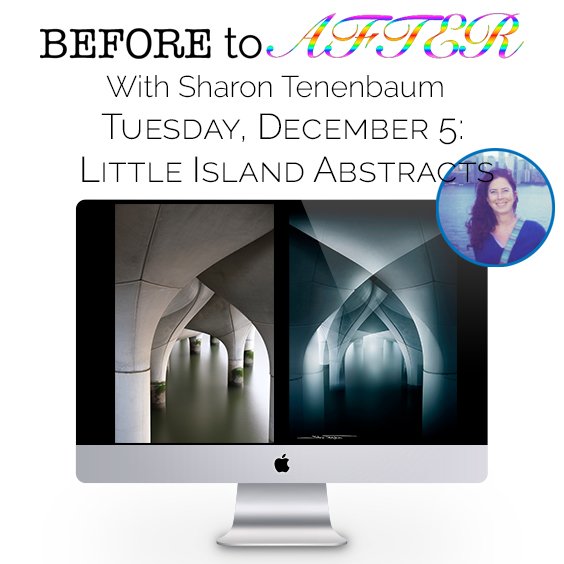












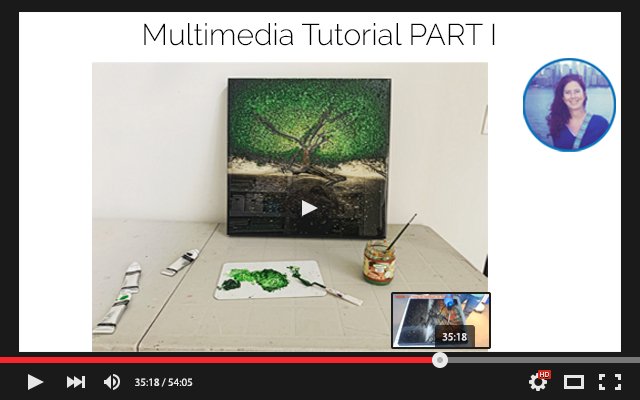


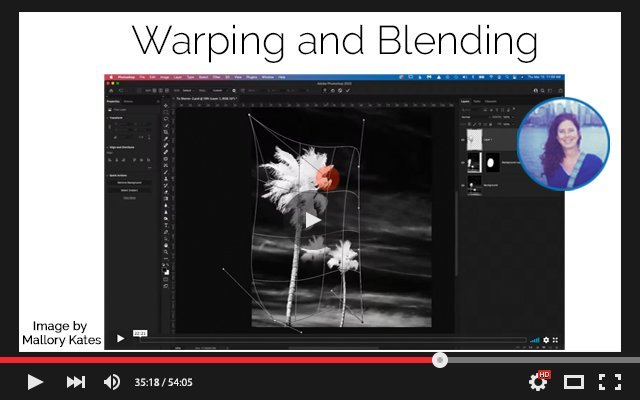
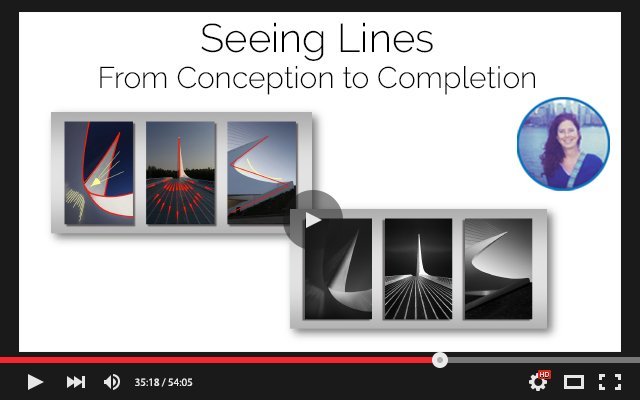



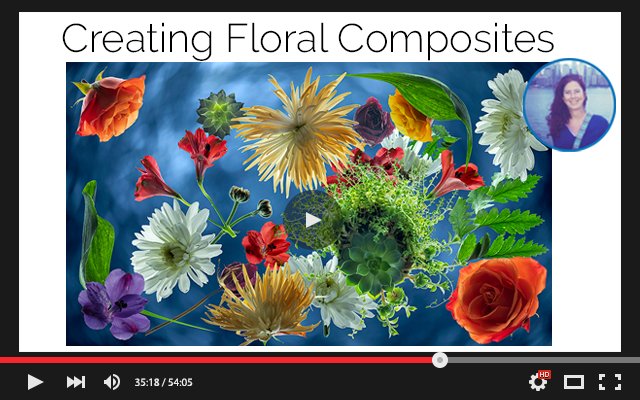

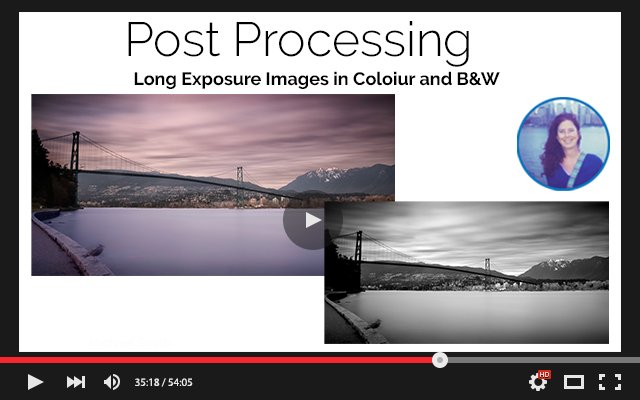


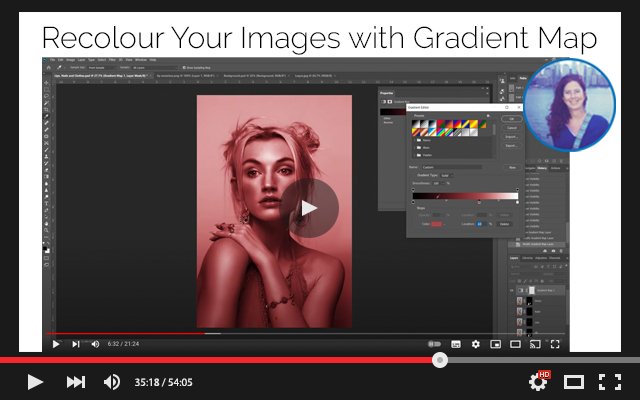

The photographic theme of Two Colours challenges you to create compelling images using only two distinct colours as the dominant visual elements. Keep in mind that black and white are not considered colours in this context and should be used sparingly. A blue sky, however, does count as a colour and may serve as one of the two. If a third colour appears in the frame, it must be minimal and not distract from the main palette. Focus on originality in subject matter, and as always, never compromise on story or composition—colour alone can’t carry an image without meaning and thoughtful structure.
WATCH NOW ON PATREON