In this podcast, Brooks Jensen elaborates on an article he wrote about what should be the reasons for attending a workshop, what to expect, and what not to expect. I could not agree with what he had to say more. From Lenswork Publishing Podcast #1336 How to Make a Workshop Work.
Read MoreHow to Read the Intensity of an ND Filter
When asked which ND (Neutral Density) Filters to get, I always tell people to get a 3, 6, and 10 F-Stop. A 6 F-Stop ND Filter means that this filter will reduce the amount of light entering your camera by 6 F-Stops. However, not all ND Filters label the intensity of their filters in such a simplified way, and more so, different brands have different labeling methods. In my eBook, The Ultimate Guide to Fine Art Long Exposure Photography, I explain all the ins and outs of ND Filters. But, for your convenience, I will provide you with a short and easy-to-understand guide that will provide you with all the information you need when purchasing your next ND Filters, so please, keep on reading below.
Overall, there are three different methods for indicating the intensity of an ND Filter:
Density, is measured by this formula, as in Tiffen and B&W filters, for example:
Density = (0.3) x (F-Stop Reduction)
Therefore, when shopping for say a Tiffen or B&W filter that reduces the amount of light by 6 F-Stops, you will look for a filter with a Density of: Density= 0.3 x 6 = 1.8, and
3 F-Stops will be 0.3x3=0.9
10 F-Stops will be 0.3x10=3
3. Filter Factor, is a very popular method amongst filter brands and refers to the multiplicative amount of light a filter blocks. The number of F-Stops required to correct the exposure with a given filter may also be calculated using the formula:
Filter Factor = 2x
Where ‘x’ is the number of F-Stop increases required. i.e. a filter that reduces the amount of light by 3 F-Stops will have a Filter Factor of:
Filter Factor = 2x=8. 2 to the power of the F-Stop reduction, so 2 to the power of 3 is 8 and will be displayed as 8x OR ND8.
I will take a B+W filter for example: All of these three measurements are printed on the filter as such (example for a 10 F-Stop Reduction Filter) and also shown below.
To read more about ND Filters, please refer to my blog on Which Filters to Buy? Part I
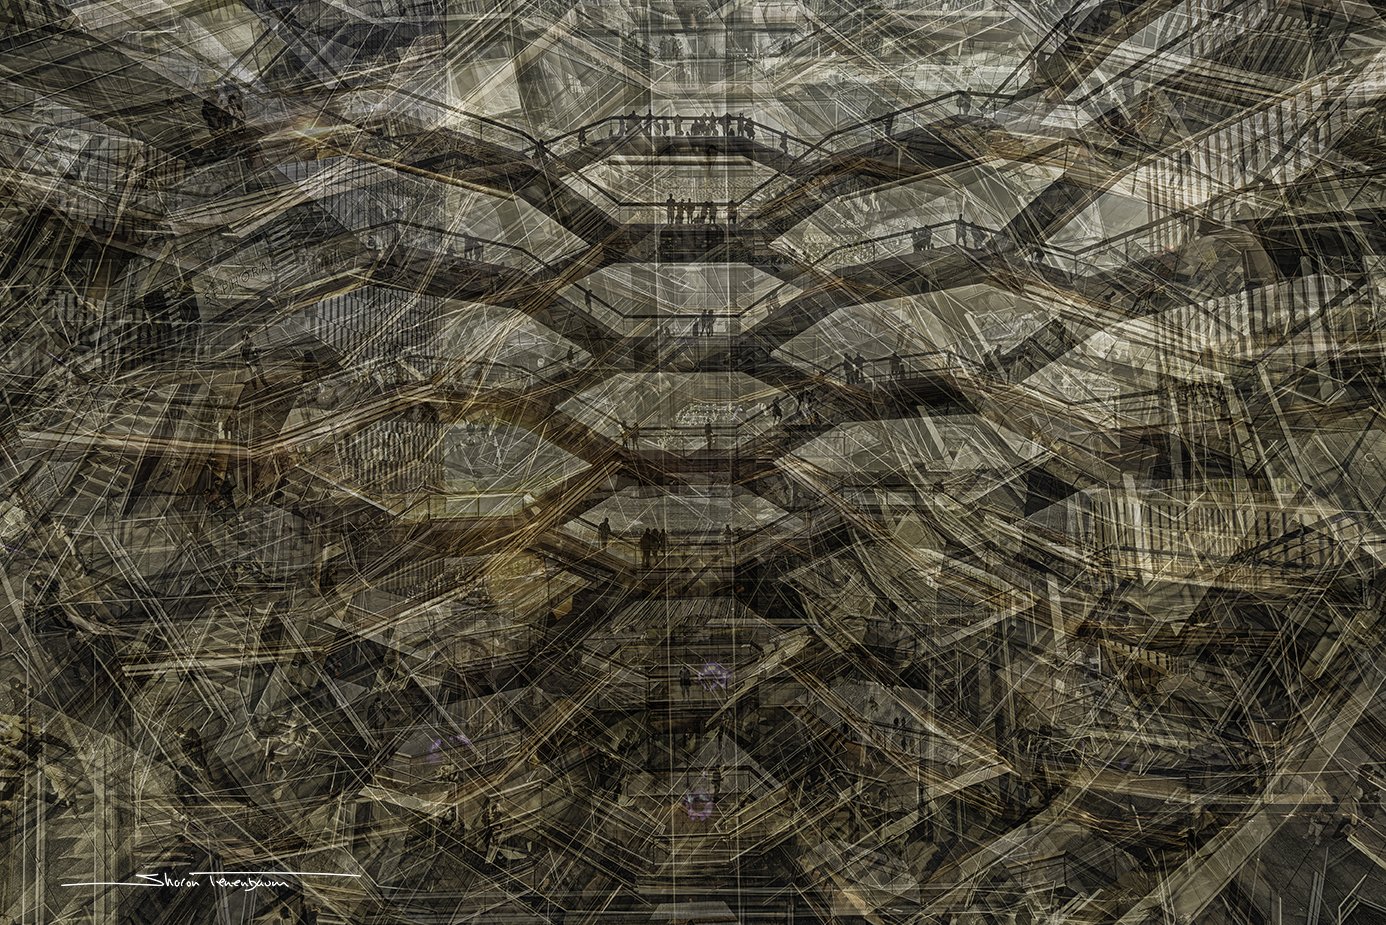
Image Stacking – Cubism Pep Ventosa Style
I can’t remember when I first saw Pep Ventosa’s images. But I do remember how mystified I was with his Carousel series depicting circular objects from various perspective points at once. It was the closest thing that I have seen that managed to depict our 3-dimensional world onto a 2-dimensional surface. It was a combination of Cubism and Impressionism in one, I was dumbfounded.
Having the analytical mind that I do, I was determined to figure out for myself how to create these stunning images. However, everything I Googled only gave me the standard algorithm the software or cameras do for multiple exposures. Reducing the opacity of each additional image in the series by half. The formula goes like this: Say you took 5 images from various angles; you would stack them up and adjust the opacities of each layer. The first image would be at 100% opacity, the second at 50% opacity, the third at 33% opacity and so on.
This formula is great if you want a result without any further post processing, meaning, your ability to show or hide specific details is limited. After giving this quite a bit of thought, I have improved this technique by developing a method to create a multiple stacked image but this time, the artist/photographer has the choice to selectively modify, enhance the image with Photoshop Layers. Thus, giving me the creative freedom to carefully choose the details I wish to incorporate or discard in my image, enhancing my results by leaps and bounds beyond the ‘pre-cooked’ formulas.
Learn More about Sharon Tenenbaum’s Image Stacking Technique.
Fine Art Photography is about creating images with vision and intention. I have said this time and again. The more tools you have in your toolbox to aid you as a means to an end, the better. Use the Image Stacking technique to convey multiple perspectives, volume, business or just an impression.
Needless to say, this technique gives crowds photo-bombing your image a whole new meaning. Now, with image stacking, instead of avoiding the crowds, you actually want to have more people in your shot. The more the better as they will just fade out into the background and provide your image with the urban ambiance it needs.
Long Exposure with Purpose and Intention
Long Exposure photography has existed since the days of the first images recorded, however, today Long Exposure, or should I rephrase and say, Daytime Long Exposure(LE), is a technique in which Neutral Density (ND) filters are placed on the lens to allow an extended exposure time. This results in an ethereal look in which stationary objects are solid and eternal, whereas the moving objects (mostly clouds), create a movement feel by either their streaky lines or by their blurred definition. Additionally, when shooting a LE image, ripples in water disappear and create a calming ethereal feel. All these elements together, create an image that is quite removed from reality the way we know it to be, a sequence of still shots.
In the last decade, LE photography has become VERY widely popular, and if I might say so, widely overused and thus losing its distinctiveness. We see time and again, in the plethora of images swarming the net, another LE image of 3 pilings in the water or the classic shot of a seascape with a dock leading into a clean horizon line decorated by a dramatic streaky sky juxtaposed by still water. Just like any new and different and idea, we get excited at first, but after a while, the novelty wears out.
At this stage of the game, LE has lost its ability to dazzle and wow us, its overuse has become mastery of technique rather than vision. When we observe art, we do not want to see just talent, we want to see something that expands our awareness, a novelty – creativity.
In my teachings of Fine Art Photography, I preach time and again to my students to use the ‘tools’ (techniques) of photography as a means to convey their end vision and not create images that are just a study in a specific technique. In the next part of the article, I will exemplify, how I use LE as a tool in my Architectural Portfolio to aid in conveying my vision for a specific scene.
My greatest passion in the field of Architectural Photography is the subject matter of Bridges. I always found them to be the greatest engineering marvels, and every once in a while, they are actually beautifully designed as well! My Bridges Portfolio is a lifelong project, evolving in complexity in conjunction with me.
As the saying goes, opposites attract, is true to art as well, a constant yin-yang of juxtaposition. Bridges symbolize strength, stability and safe passage while overcoming obstacles. By combing a Long Exposure image of a bridge, we are opposing the classic characteristics. We can do that with a turbulent streaky sky that accentuates the stability of the bridge to stand strong in the face of the element, or a calm serene sky that introduces a softness to a strong concrete and steel structure. This contrast is what adds depth and interest to a somewhat ‘simple’ scene.
Vasco de Gama bridge in Lisbon Portugal. By capturing this bridge in a Long Exposure with a soft sky and still waters, I was exemplifying the concept of a ‘safe passage’ that bridges provide.
Assut de l'Or in Valencia Spain, I used Long Exposure to eliminate detail in the sky and water to simplify my scene and bring attention to form. The bridge reminded me of an archer’s bow, so I needed to still water a long Exposure to create the symmetry of the bow.
Tilikum Crossing, Portland OR
I chose to accentuate the modern clean lines by juxtaposing them with the iron trestle bridge. The cropped composition was just enough to create an abstract feel without losing context.
One way to eliminate unnecessary details in the image, such as distinct cloud formations or water ripples is to shoot a Long Exposure image. The long exposure technique works as two-fold. First, as I mentioned, it eliminates irrelevant details that don’t add to the story you are telling. Second, a long exposure image creates a ‘soft’ feel to an image, it smoothens out details. This smoothness counters the strong and stable impression we have from a bridge. A stable structure promising safe passage between two seemingly unpassable locations.
Notice in the image below how ripples were eliminated (due to a long exposure capture). Even though this was a long exposure image, the clouds retained details as they weren’t moving all that much. This eventually added to the drama and impression of strength it gave the bridge, standing strong and withstanding the elements. As described above, the soft long exposure water created a nice juxtaposition to the strong bridge and looming sky.
One of the more creative ways to use Long Exposure is to create Expressive Art. The image here is not a bridge image, but does belong in my architectural portfolio. In this image, the top left curves of the structure (Design Museum, Holon, Israel) reminded me of fingers strumming a guitar. It was that vision that guided my thought process to use LE in the sky to make streaks that would emulate guitar cables.
Think Outside the Box:
Recently I have been enjoying photographing architectural interiors. I love the large depth of field and how the image draws you in in layers. However, after processing the images, I found something was missing, a little pizazz and flair to add to an image. While exploring the hidden corners of my creativity, I decided to turn interiors into exteriors by adding a portal into a Long Exposure Sky.
To summarize, a great fine art photo always starts with Vision – ‘what do you want to convey in your image?’, ‘What do you want to say?’ Once you have that clear, and you don’t always need to be able to express it in words, but you do need to know what it is. What made pick up the camera and point at this angle? What intrigued you about this scene? These are questions you should be asking yourself. Once you know what your vision is, use the tools in your photographic toolbox to aid in conveying that vision. Use Long Exposure as a means to an end and not as an end in itself.
Sharon Tenenbaum teaches Long Exposure Photography and Fine Art Architectural Photography Workshops around the world. She has just released a NEW, UPDATED and EXPANDED version of her classic best-selling eBook: The Ultimate Guide to Long Exposure Fine Art Photography. The eBook is the most comprehensive Long Exposure guide you can find with over 230 pages of theory, practice and hands-on post-processing examples with attached files for you to follow along!
How to Write a Vision Statement?
What to do and NOT to do when writing a vision statement. Plus, an example of my own series, Inside Out - Combing Two Passions as an example.
Read MoreNew Photoshop 2021 Sky Replacement - is it a Game Changer?
Yes, Photoshop 2021 Can Replace Skies with virtually a few clicks. However, is it a game changer? I will be reviewing some of the features it presents in this blog.
Left: Image without Sky replacement. Right: After using the PS 2021 Sky Replacement feature.
In Photoshop 2021 you can clearly see major improvement and attempts from the Adobe designers to simplify Photoshop and make complex tasks more streamlined and less intimidating to the Photoshop newcomer. Most of the new features are still in beta and a closer look reveals that there is still work to be done.
So let’s have a closer look and see what actually is wrong here, as, from a first glance, it looks quite amazing. You can access this new feature under Edit->Sky Replacement. I took a photo in which there was no ambiance in the sky and within seconds I replaced it with one of the Sky Replacement images Adobe has provided (if you wish to use one of your own skies, no problem, just import it into the Sky Replacement panel by clicking the plus icon at the bottom). Once I was happy with the result in the preview panel, I made sure to have the settings of my Output to New Layers, this will ensure that the new sky will be neatly placed on a folder in my Layers Panel and I can turn it On or Off as I wish with creating any destructive changes to my original image.
In the image above, Photoshop created a mask for the new sky, however,
notice how the new sky is not selected properly to reach the edge of the building.
We do get to see the mask that was created with the sky replacement. A closer look at the sky mask shows the windows were selected as part of the sky. So, if you are familiar with Photoshop tools, you can manually fix this by using a brush in Overlay or Soft Light Blending Mode, this will create more contrast in the white sky of the mask without 'painting' over the building. - All the things taught in Sharon’sPhotoshop Workshops!
Conclusion:
If you know your way around Photoshop these new features are a great way to expedite your process, especially if you know how to fix the blemishes. If you are new to Photoshop, these tools can be a great way to get your feet wet with all the world of possibilities available in the magical world of Photoshop in a non-intimidating way!
If you wish to join the party and get started in Photoshop or are just looking to enhance your existing skills, Sharon has Photoshop Workshops for ALL skill levels, Beginners, Intermediate and Advanced.
Telling a Visual Story Through Composition and Perspective
What is the difference between Composition and Perspective? Read how to use them and create images that convey more accurately your experience of a given scene by adding multiple dimensions to your photographs.
Read MoreTelling A Visual Story Through Light and Shadow
Discover the features that add emotion and depth to your flat two dimensional images. How the play of light and shadow and increased contrast can transform your image from a flat emotionless image to a wow popping masterpiece!
Read MorePaintagraphy - Painted Landscapes
Paintagraphy - The art of painting on photographs. Sharon Tenenbaum shares her vision and work process when painting on her photographic images.
Read MoreOlympus LIVETIME Feature for Long Exposure Photography
The Pros and Cons of the Olympus Live Time Feature. LiveTime feature in the Olympus OM-D E-M1 MarkII allows you to see the image as it is 'developing'. This feature is revolutionary in Long Exposure Photography. This enables you to see in set increments the ‘development’ and histogram of the image as it is being captured on the sensor. This is HUGE in the world of Long Exposure Photography as it means that you can now always get a properly exposed image.
Read MoreWhich ND Filters to Buy? Part I
Addressing the two different filter systems, Circular vs. Square. Extensive blog that describes the advantages and disadvantages of both.
Read MoreFine Art – What is all about?
The camera is not like the human eye; it records without fail every detail captured in it's frame of vision. The human eye/mind is not like that. When we are in front of a scene, there are things that register in our mind and things that don’t. We see something that intrigues us, be it beauty, geometry or a statement we want to make. Our mind sees our intent and discards all the irrelevant details ‘cluttering’ the scene. In Fine Art Photography it is the task of the photographer/artist to convey what she saw in her mind’s eye using a tool that does not see like the mind.
SHOW MORE
Read MoreNYC New Images - Exploring Architectural Abstract
The world of abstract photography is very elusive and vague. I often tell people that it is equivalent to poetry. It conveys more in what it doesn’t say or show than what it does. By taking something out of context and presenting only a part of the whole, we are prompting a few mental triggers that we humans, love so much to play with, Read more to find out what these triggers are.
Read MoreFuji X-T2 Review
What does your art really need? Is it a bigger mega pixel count so I can print images to fit the siding of a NY skyscraper or is it a deeper and more creative outlook that a smaller camera can assist and be a ‘tool’ in conveying your vision. Find here the Pros and Cons to switching from a Full Frame to the Mirrorless.
Read More